What the shop is
Your shop lets customers buy products from your own website, alongside their bookings. You might sell treats, leads, towels, branded merchandise or gift cards. Customers choose delivery or collection, then pay by card, with Apple Pay or Google Pay, or with a voucher. If your Stripe account can take Direct Debit, customers can pay that way too, but it takes a few working days to clear. You then see each order in Muddy and record it when it goes out.
The shop lives on the same website as your booking pages. It isn't a separate site, and customers don't need a separate account to use it.
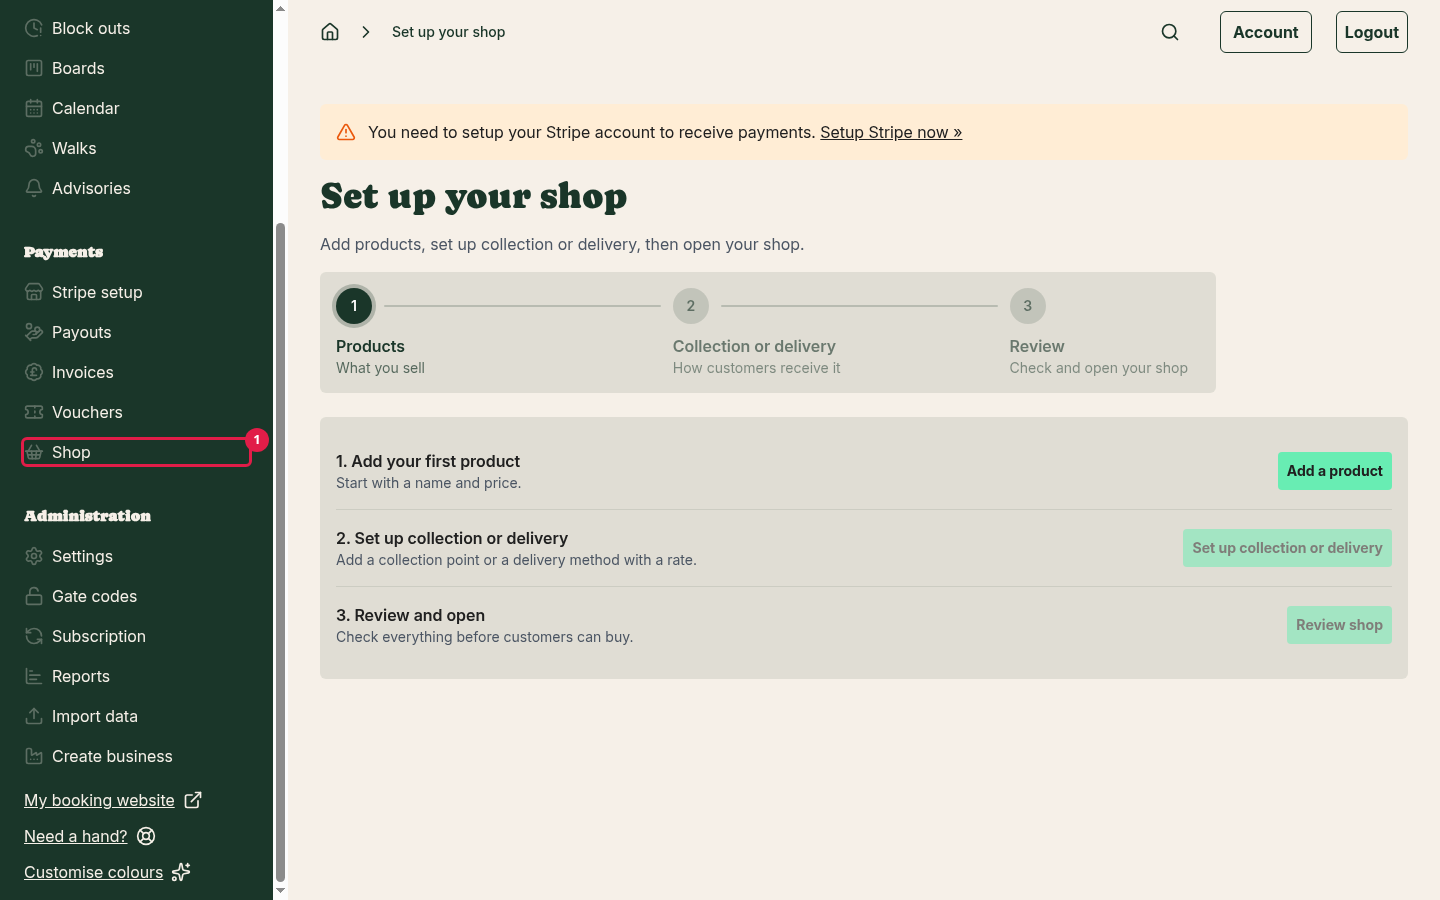
To get there, click Shop (1) in the left-hand menu. It sits in the Payments section, below Vouchers (and Loyalty points, if you use them).
Setting up your shop for the first time
Your shop starts closed, so you can set everything up before customers see it. Until you open it for the first time, the Shop page is called Set up your shop and walks you through three steps. A bar across the top shows which step you're on.
Tip: you need a Stripe account connected before customers can pay by card. If you already take card payments for bookings, you're set. If not, click Stripe setup in the left-hand menu first.
Step 1: Add your first product
- Click Shop in the left-hand menu.
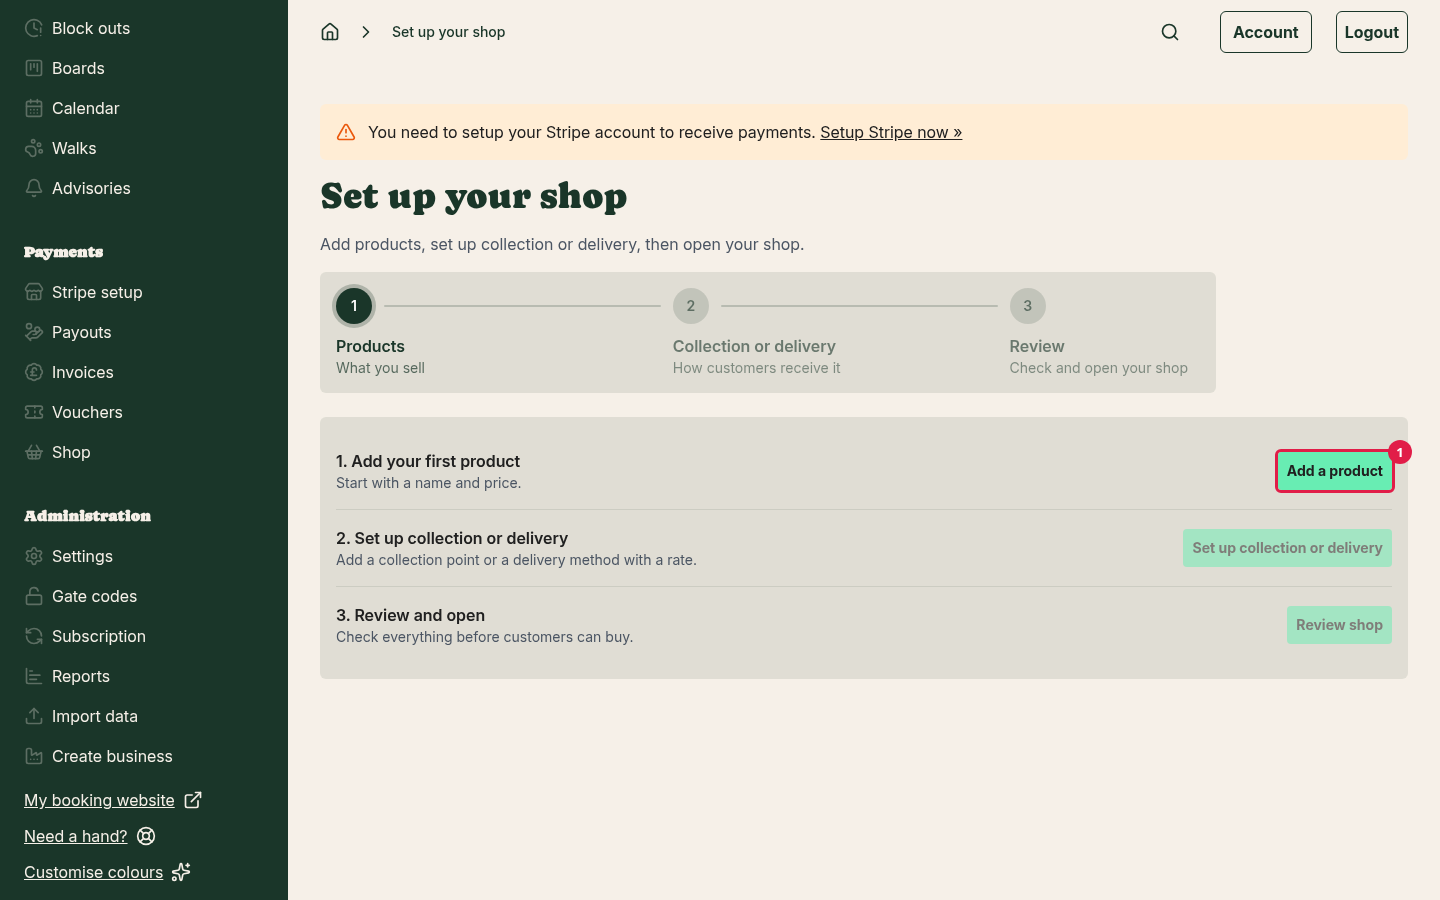
- Under 1. Add your first product, click Add a product (1).
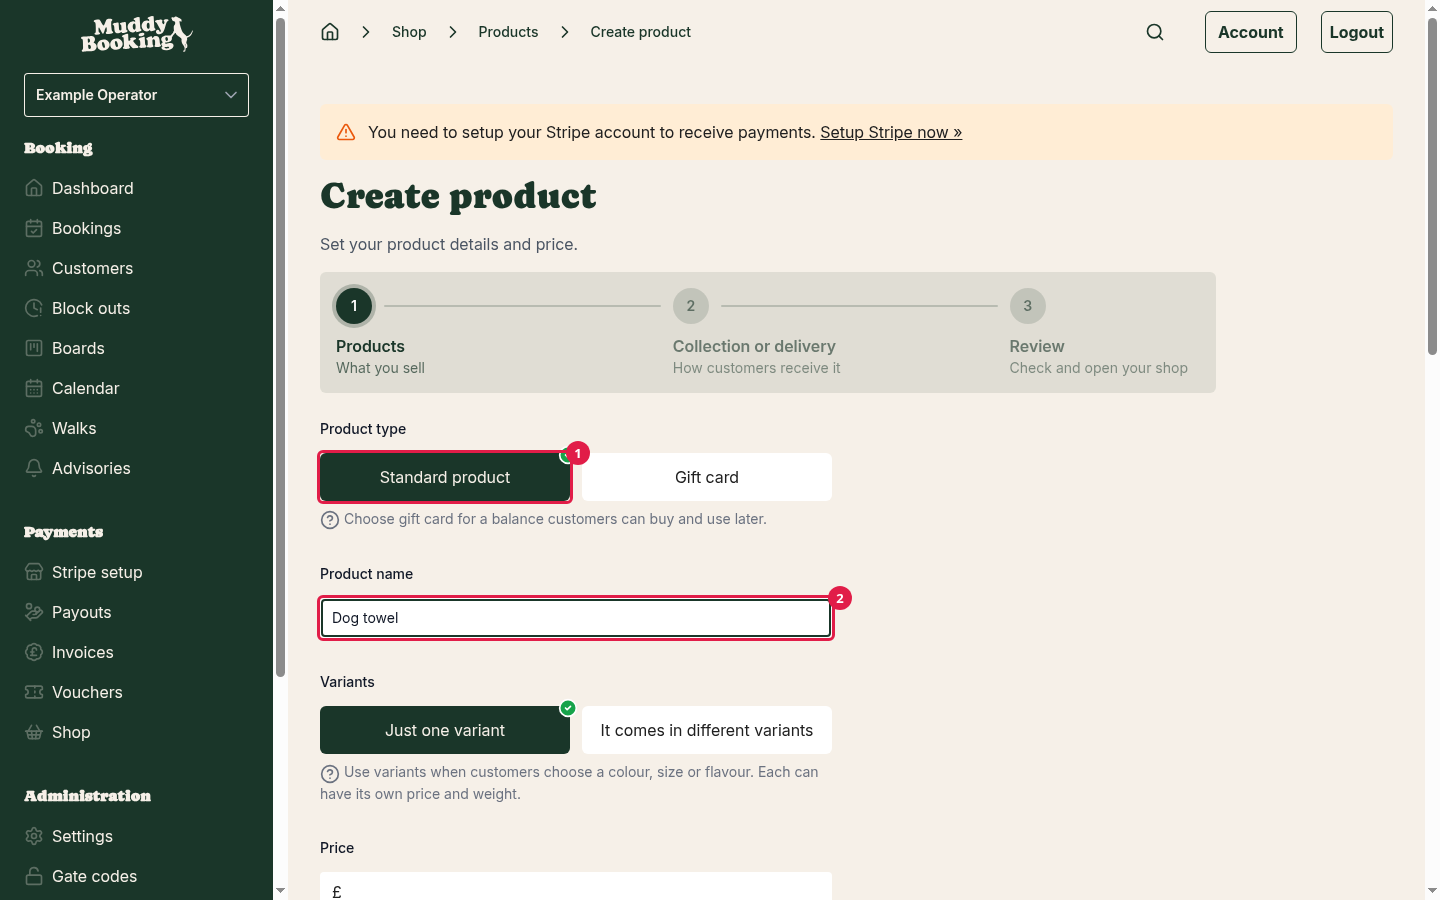
- Choose the Product type (1), enter a Product name (2), and fill in the rest of the product's details. See Adding products and variants, or Selling gift cards for gift cards.
- Click Save and continue (1).
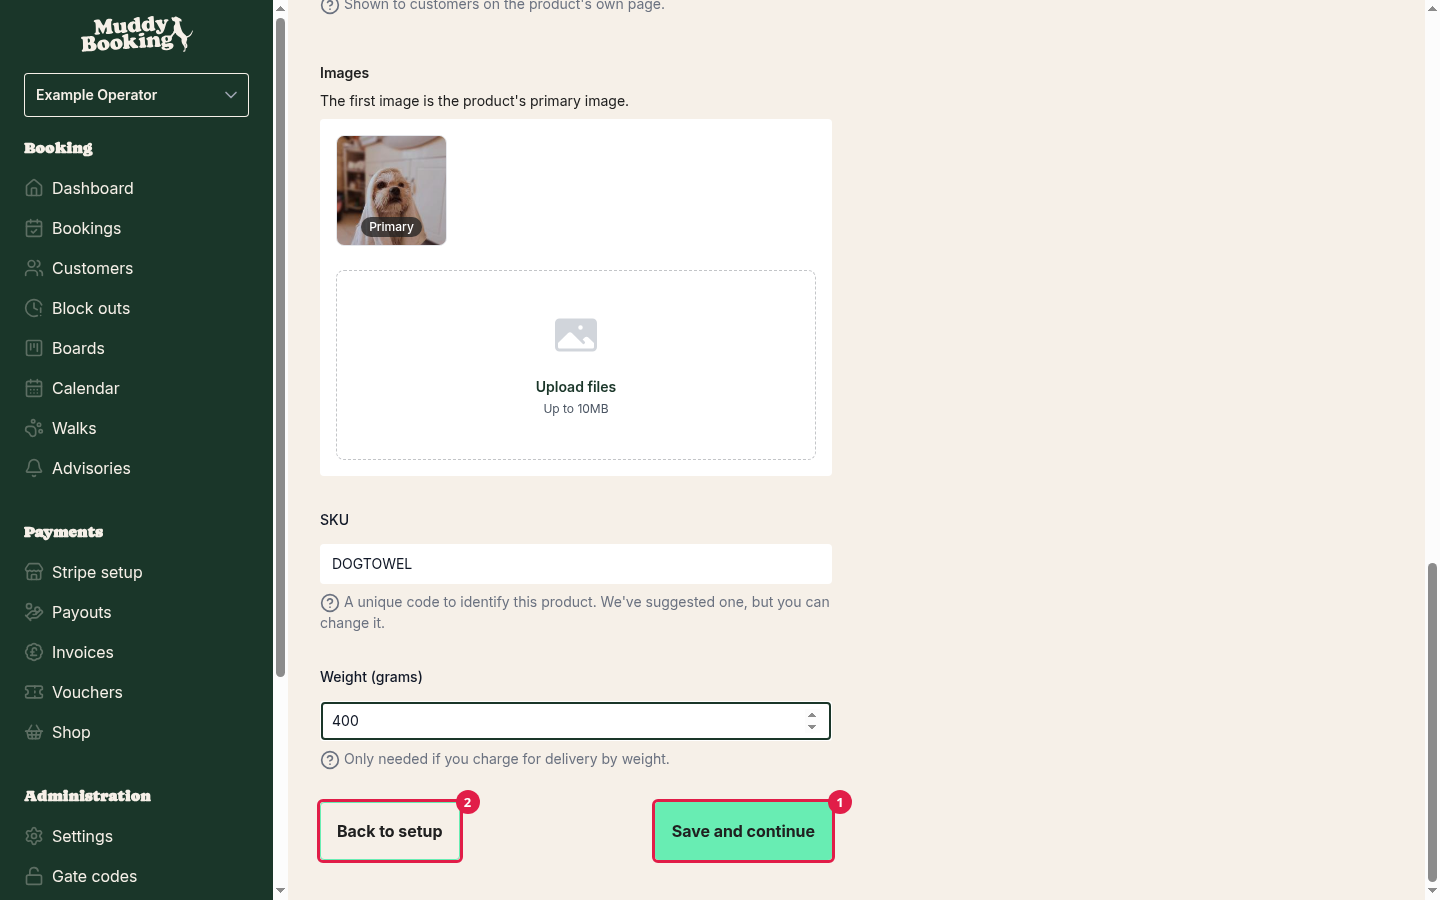
Muddy saves the product and takes you straight on to the next step. To add more products first, click Back to setup on that page, then Review products, and add them from the Products page.
Back to setup (2) on the product form leaves without saving the product.
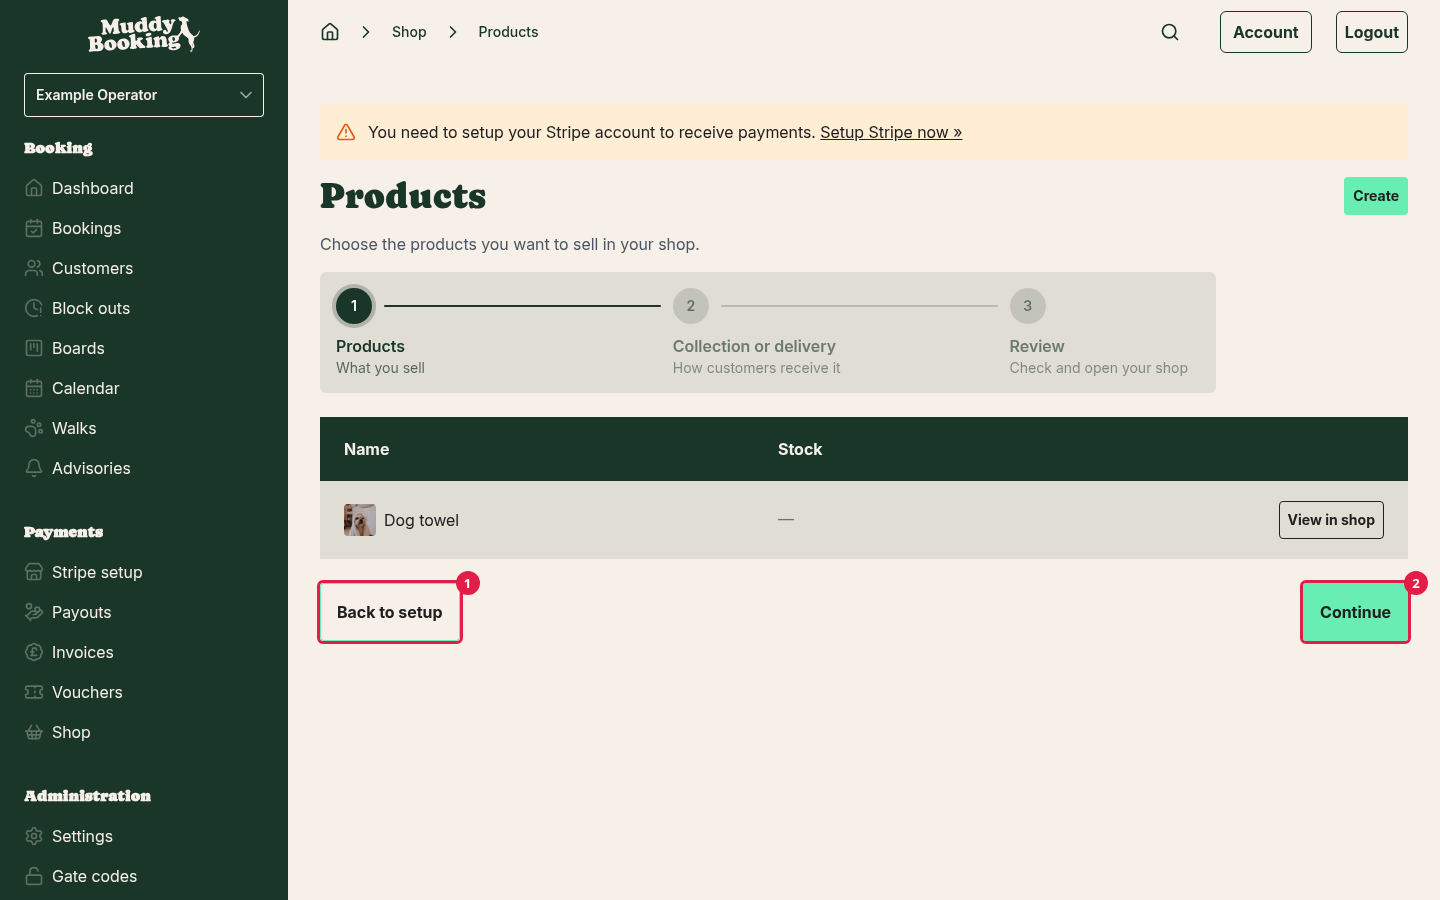
While you're setting up, the Products page shows the same step bar. Click Back to setup (1) to return to the checklist, or Continue (2) when you're done.
Step 2: Set up collection or delivery
Customers need a way to get anything physical you sell. Add at least one collection point, or a delivery method with a rate. See Setting up delivery and collection.
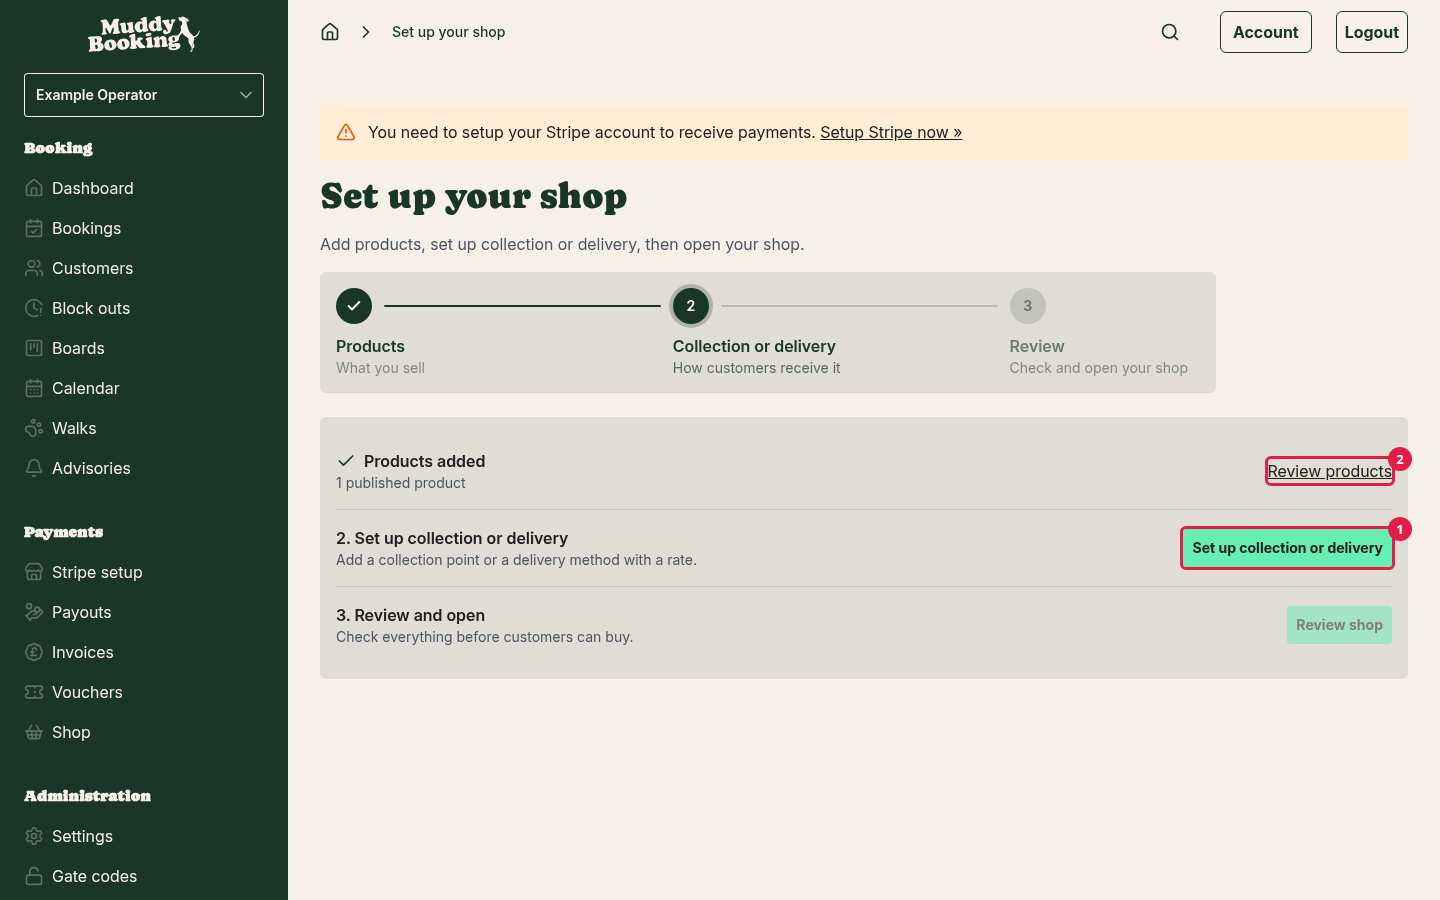
- Under 2. Set up collection or delivery, click Set up collection or delivery (1). If you want to add more products first, click Review products (2) instead.
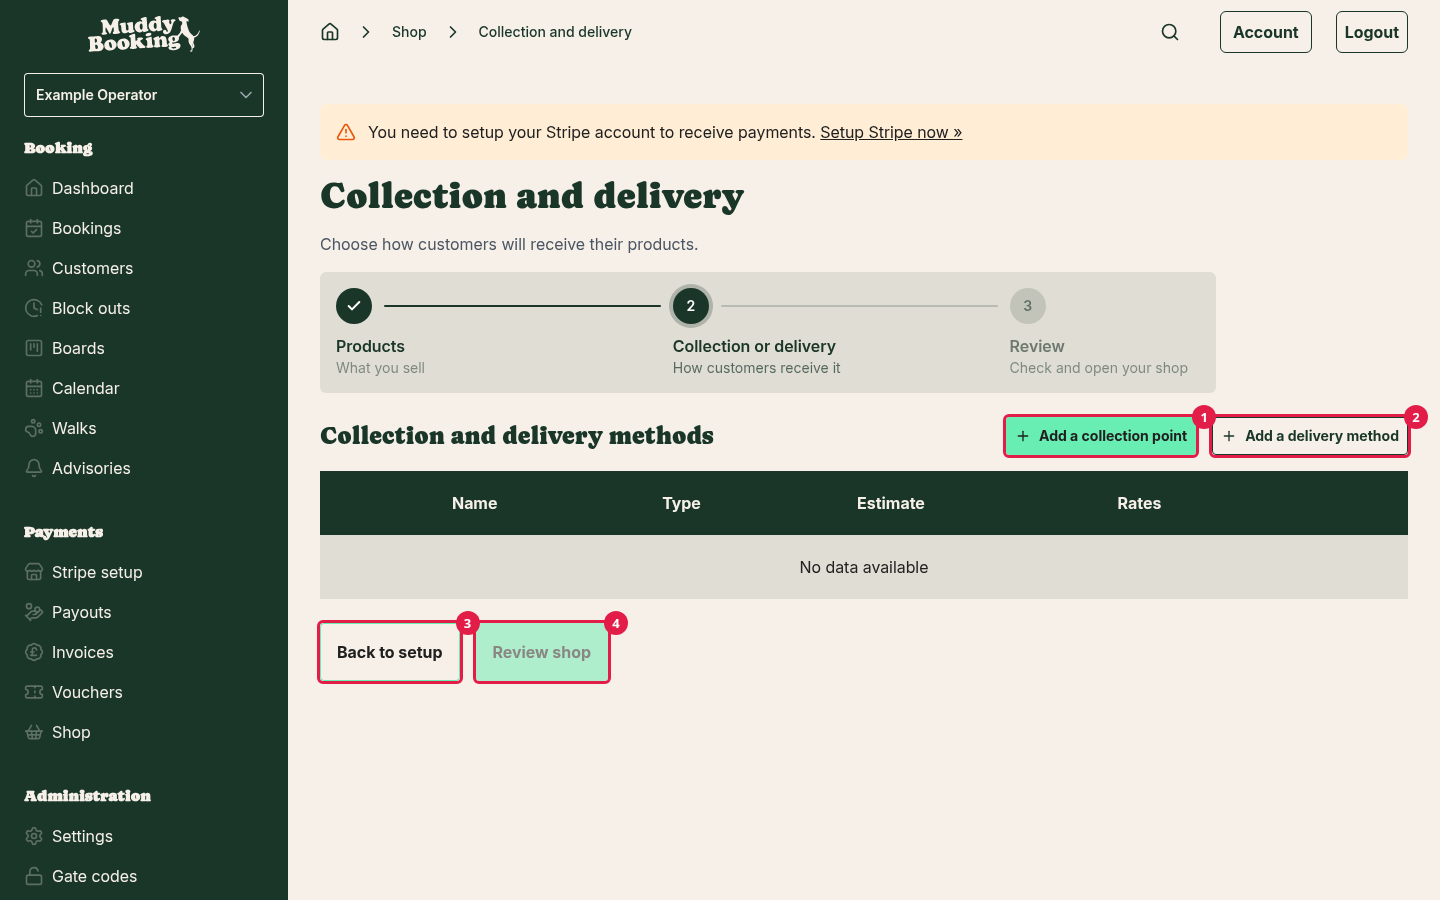
- Add a collection point (1), or a delivery method (2) and then a rate for it. Back to setup (3) takes you back to the checklist. Review shop (4) works once customers have a way to get their order.
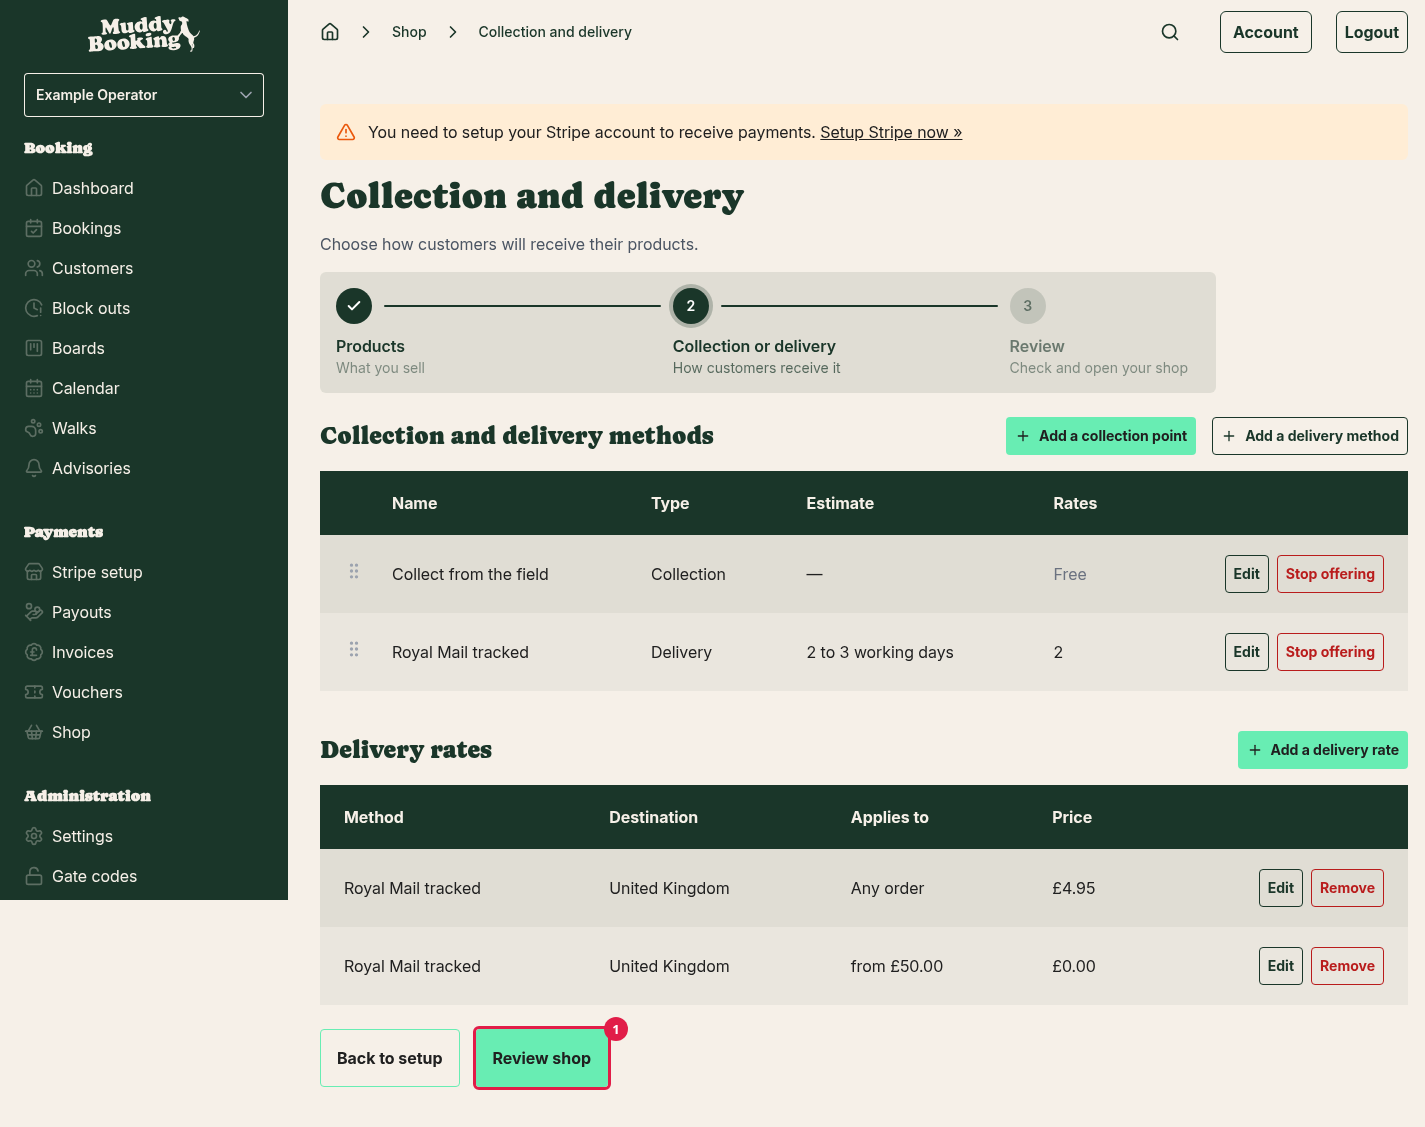
- When you've added them, click Review shop (1).
If you only sell things that don't need posting, such as gift cards, Muddy skips this step and shows Not needed for your current products.
Before you open
Setup doesn't check these, but they're worth doing before customers arrive:
- Group your products into collections. This makes your shop front much easier to browse. See Organising your shop with collections.
- Check your legal policies. Your terms and conditions and other policies show at checkout (more on this below). See Setting up legal documents.
While you're setting up, you can reach Products through Review products. Options, Collections and Collection and delivery are also under Settings in the left-hand menu. The rest of the shop's pages, including Stock, appear on the Shop page once your shop is open. If you track stock, set it as soon as you open. See Tracking stock.
Step 3: Review and open
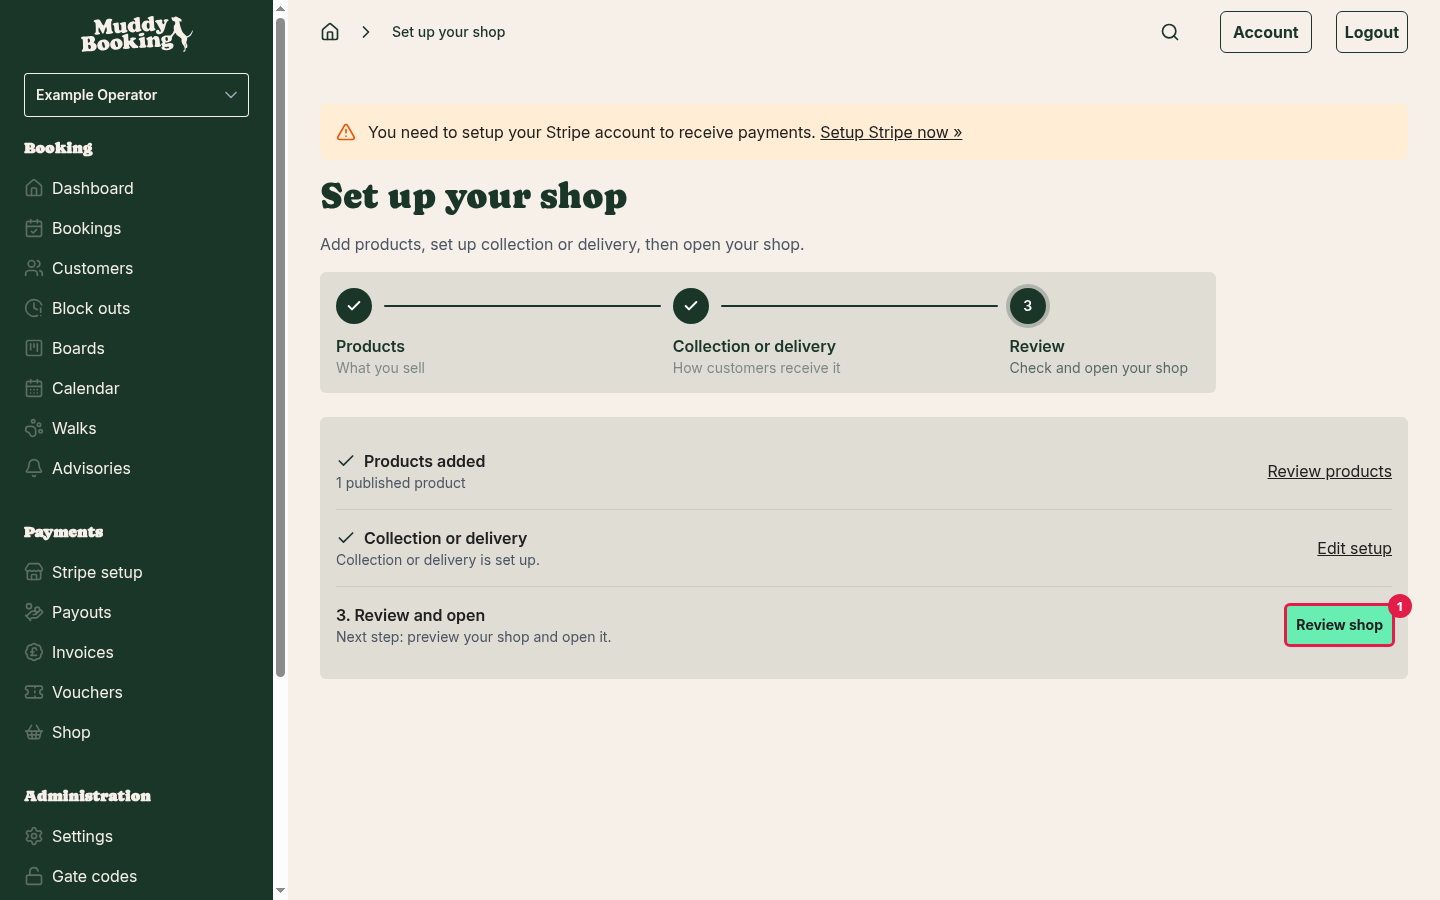
- Under 3. Review and open, click Review shop (1). The button works once you have a product to sell and, if you need it, collection or delivery.
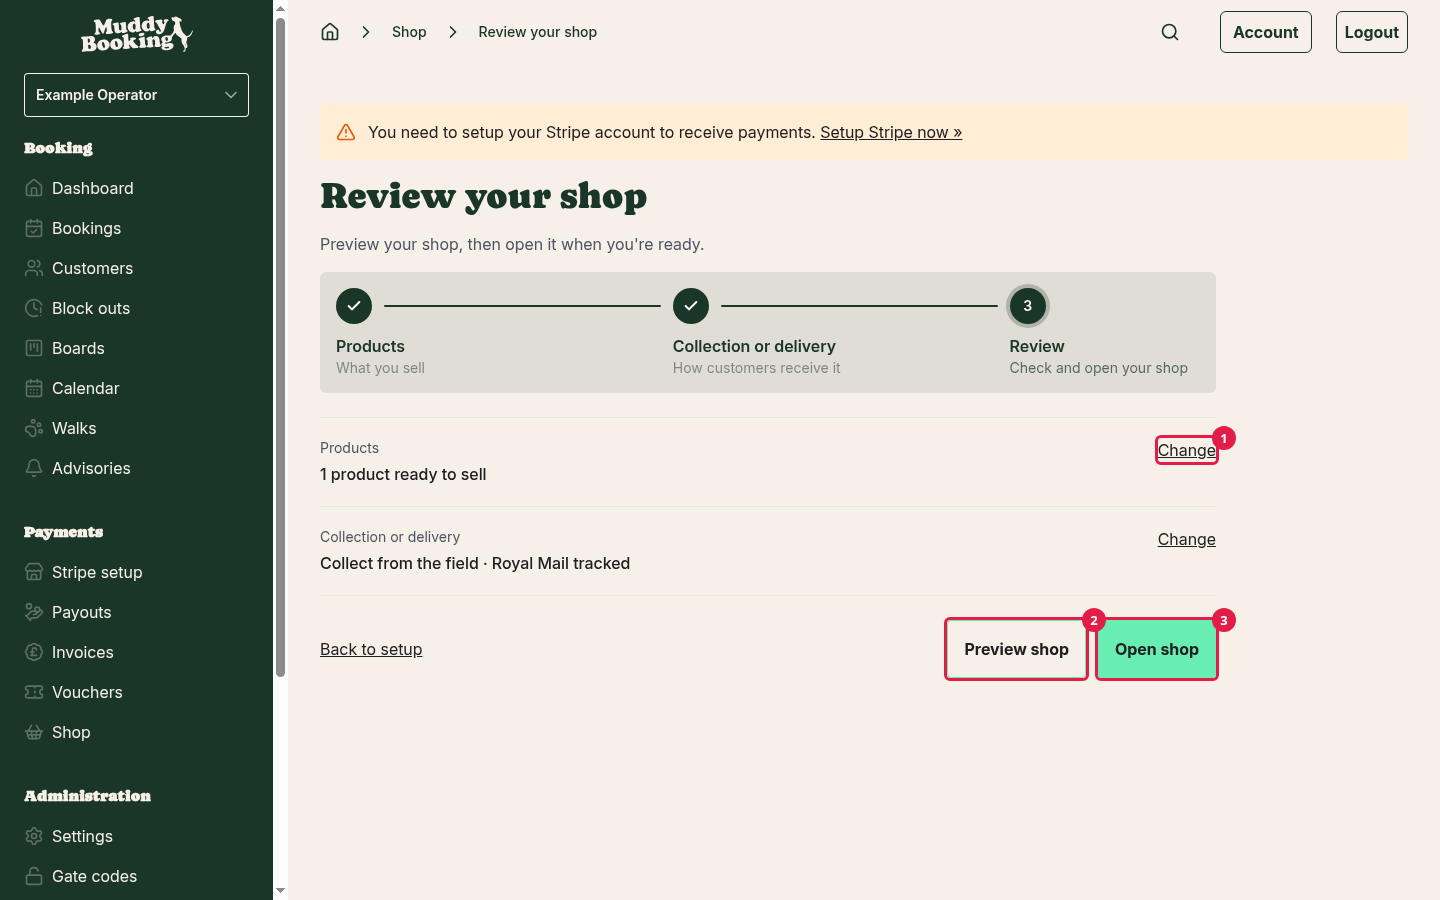
- The Review your shop page shows how many products are ready to sell, and your collection and delivery methods. Click Change (1) next to either to go back to it.
- Click Preview shop (2) to see your shop as a customer would (see below).
- Click Open shop (3).
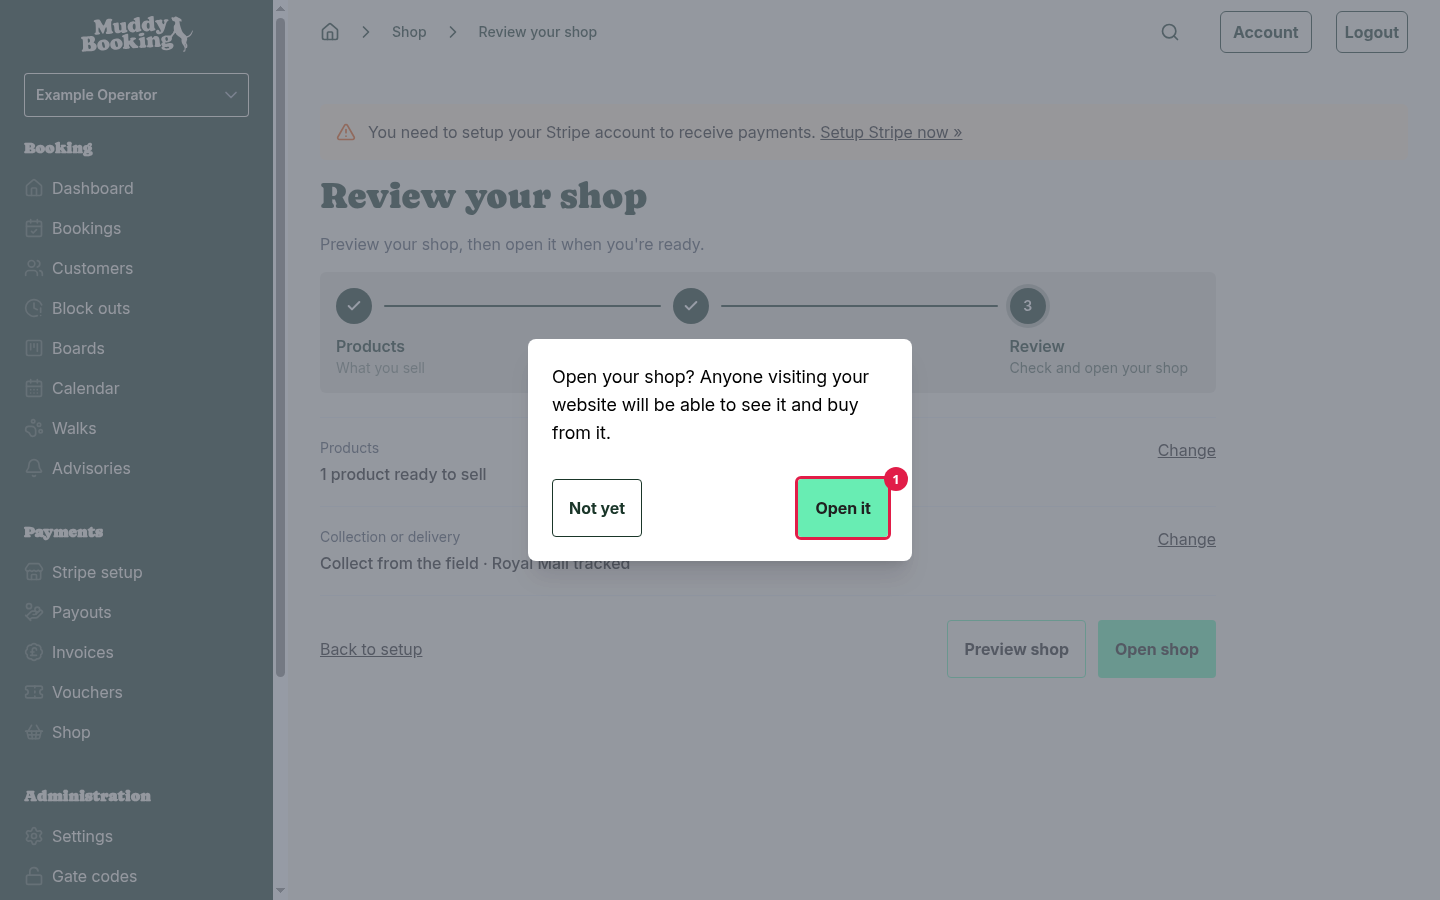
- Click Open it (1) to confirm.
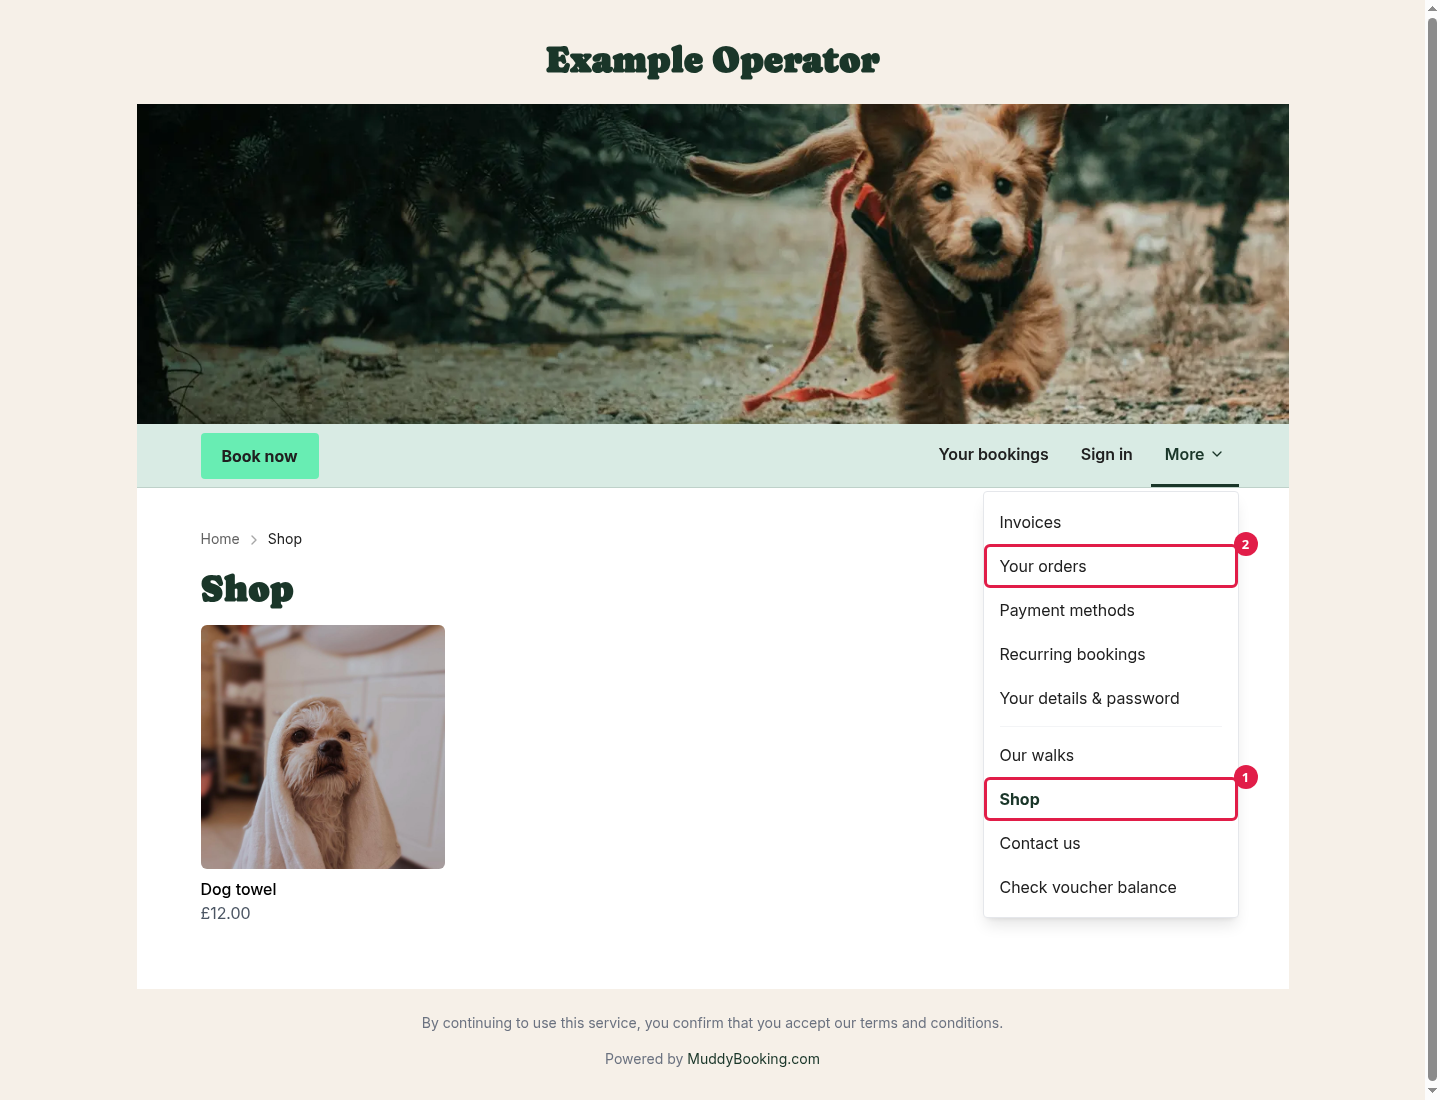
Anyone visiting your website can now see the shop and buy from it. Shop (1) and Your orders (2) links appear in your website's menu.
From now on, changes you make go live straight away. That includes prices, products, delivery charges and the order of your collections, so it's worth making big changes carefully.
The shop page
Once your shop is set up, the Shop page is your starting point. At the top you'll see a few figures:
- Awaiting fulfilment (1): orders you still need to send or hand over. This includes orders with a payment that's still clearing, which show Payment pending on the Orders page.
- Sales, last 30 days (2): the total of orders placed in the last 30 days, not counting cancelled orders.
- Products for sale (3): published products in your shop.
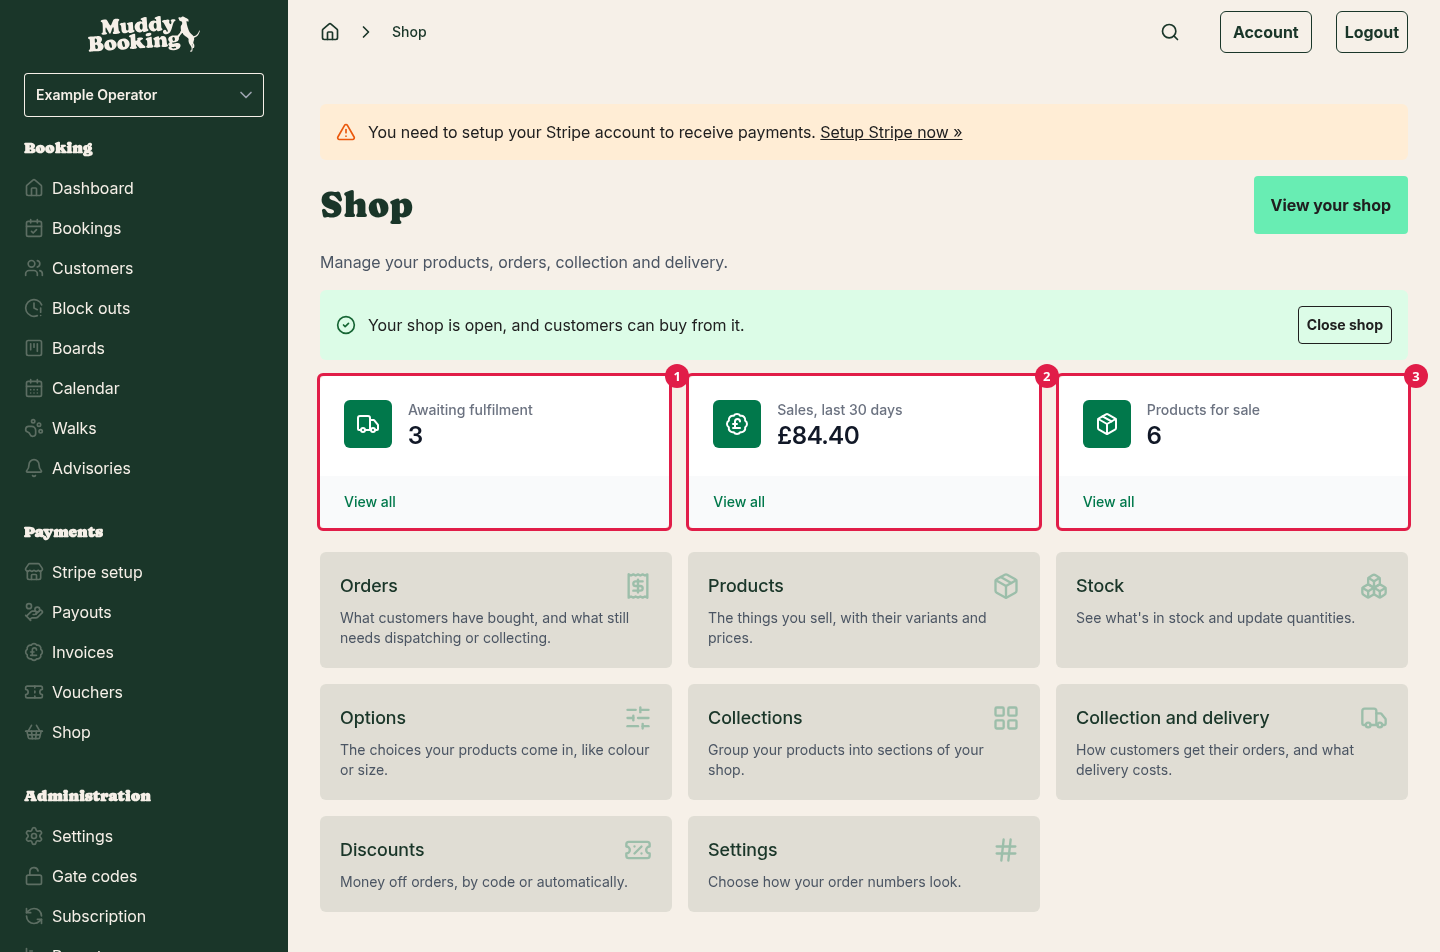
Below the figures are links to every part of the shop:
- Orders: what customers have bought and what still needs to go out.
- Products: the things you sell.
- Stock: how many of each thing you have.
- Options: the choices a product comes in, like colour or size.
- Collections: the sections of your shop front.
- Collection and delivery: how customers get their orders, and what delivery costs.
- Discounts: money off, by code or automatically. Discounts can apply to bookings too, so they live in your settings rather than inside the shop.
- Settings: how your order numbers look.
Previewing your shop
You can look at your shop exactly as a customer would before anyone else can.
- While you're setting up, click Preview shop on the Review your shop page.
- After that, click Shop in the left-hand menu, then Preview your shop at the top of the page.
Your shop opens in a new tab. A banner at the top (1) reminds you that you're previewing, which lets you see pages your customers can't see yet.
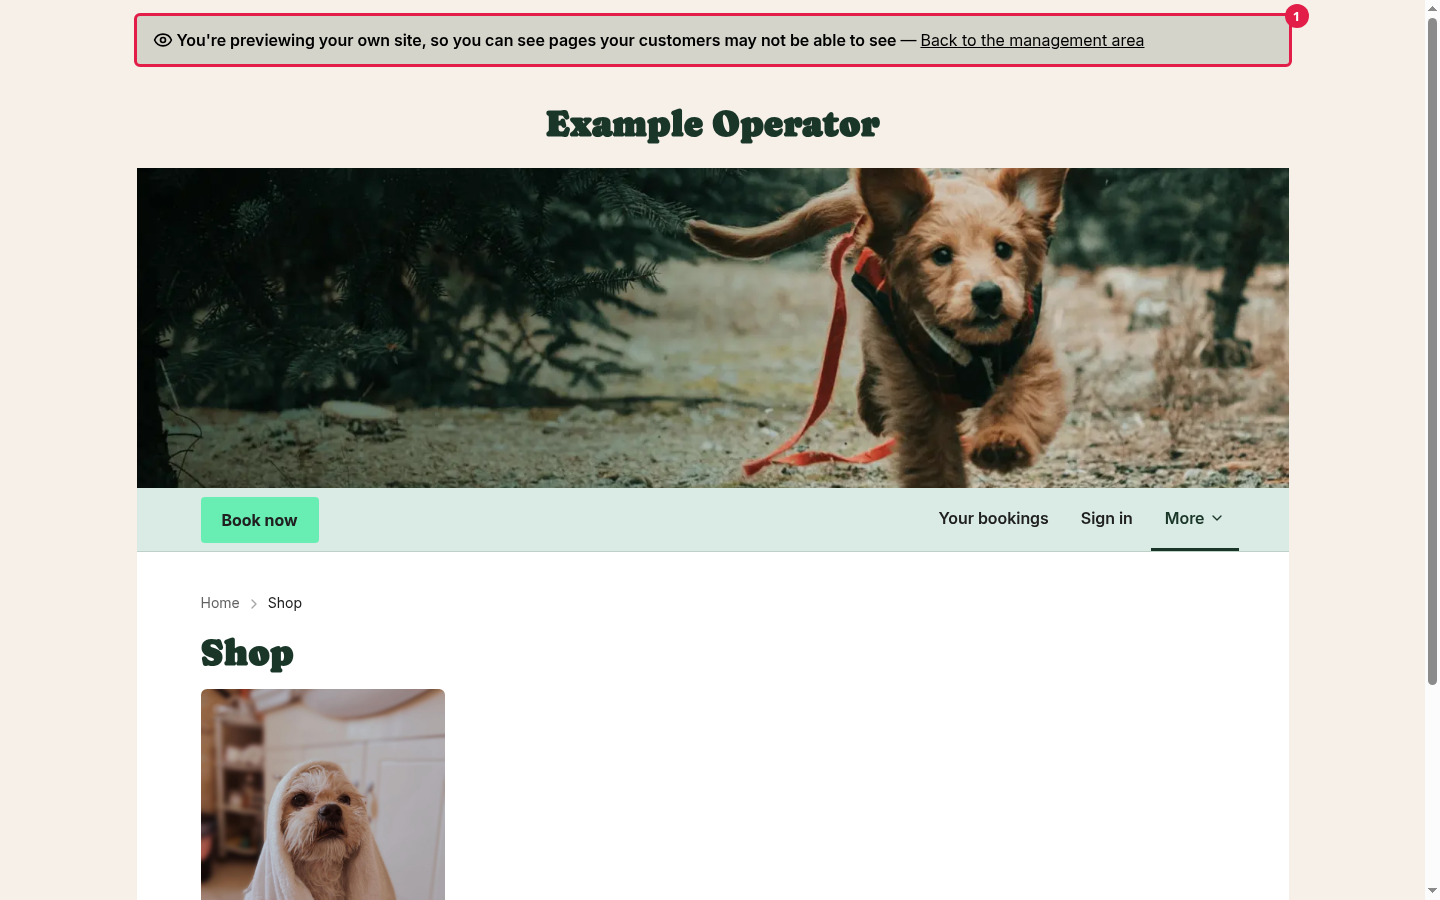
The preview lasts 30 minutes, then you'll need to click the preview button again.
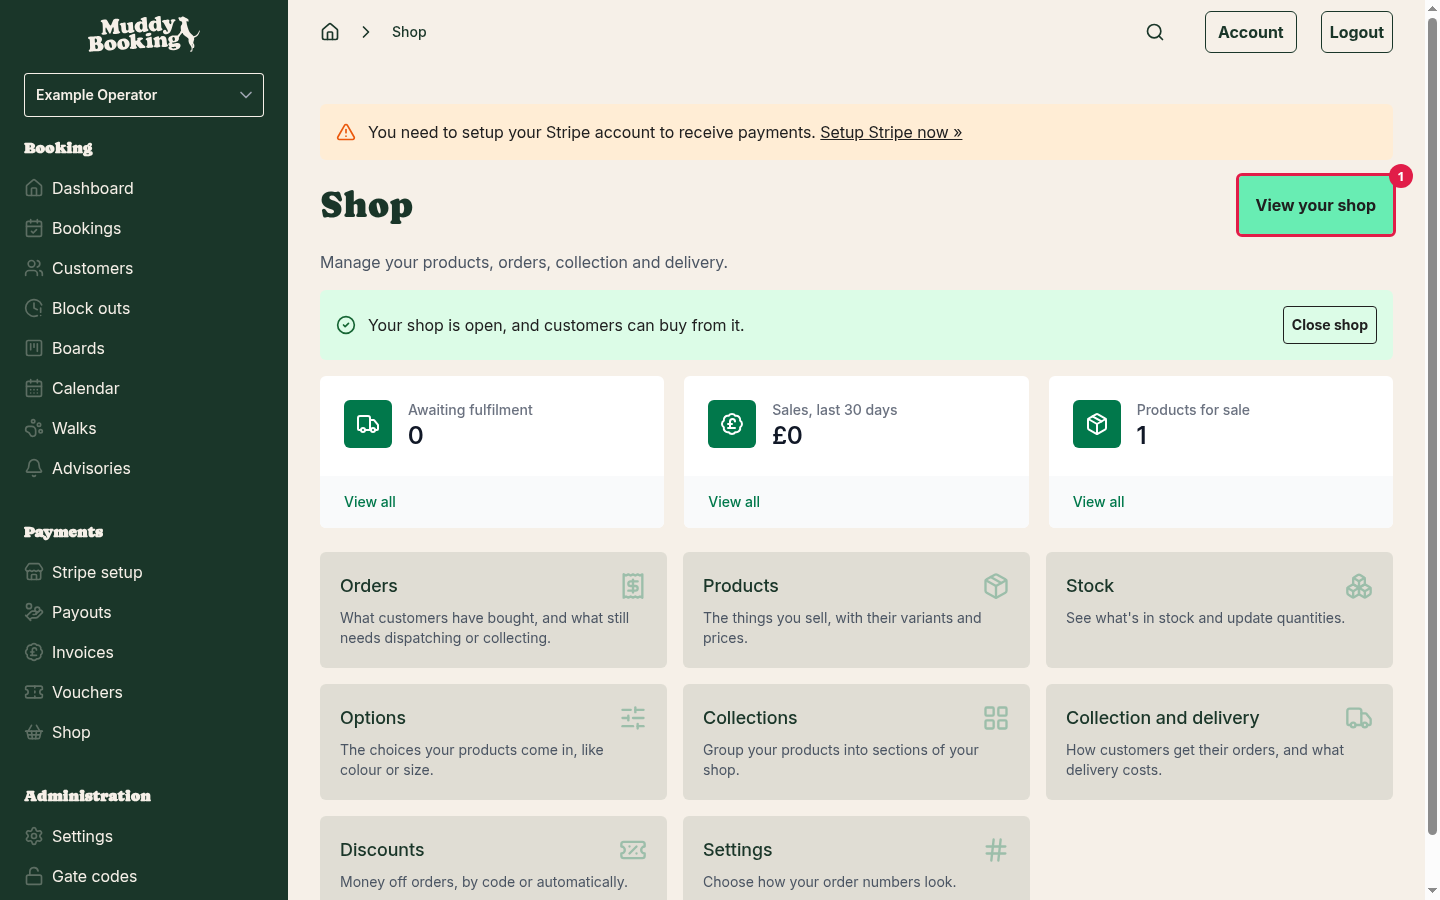
Once your shop is open, the button on the Shop page says View your shop (1) instead.
Opening your shop again
If you've closed your shop since you first opened it:
- Click Shop in the left-hand menu.
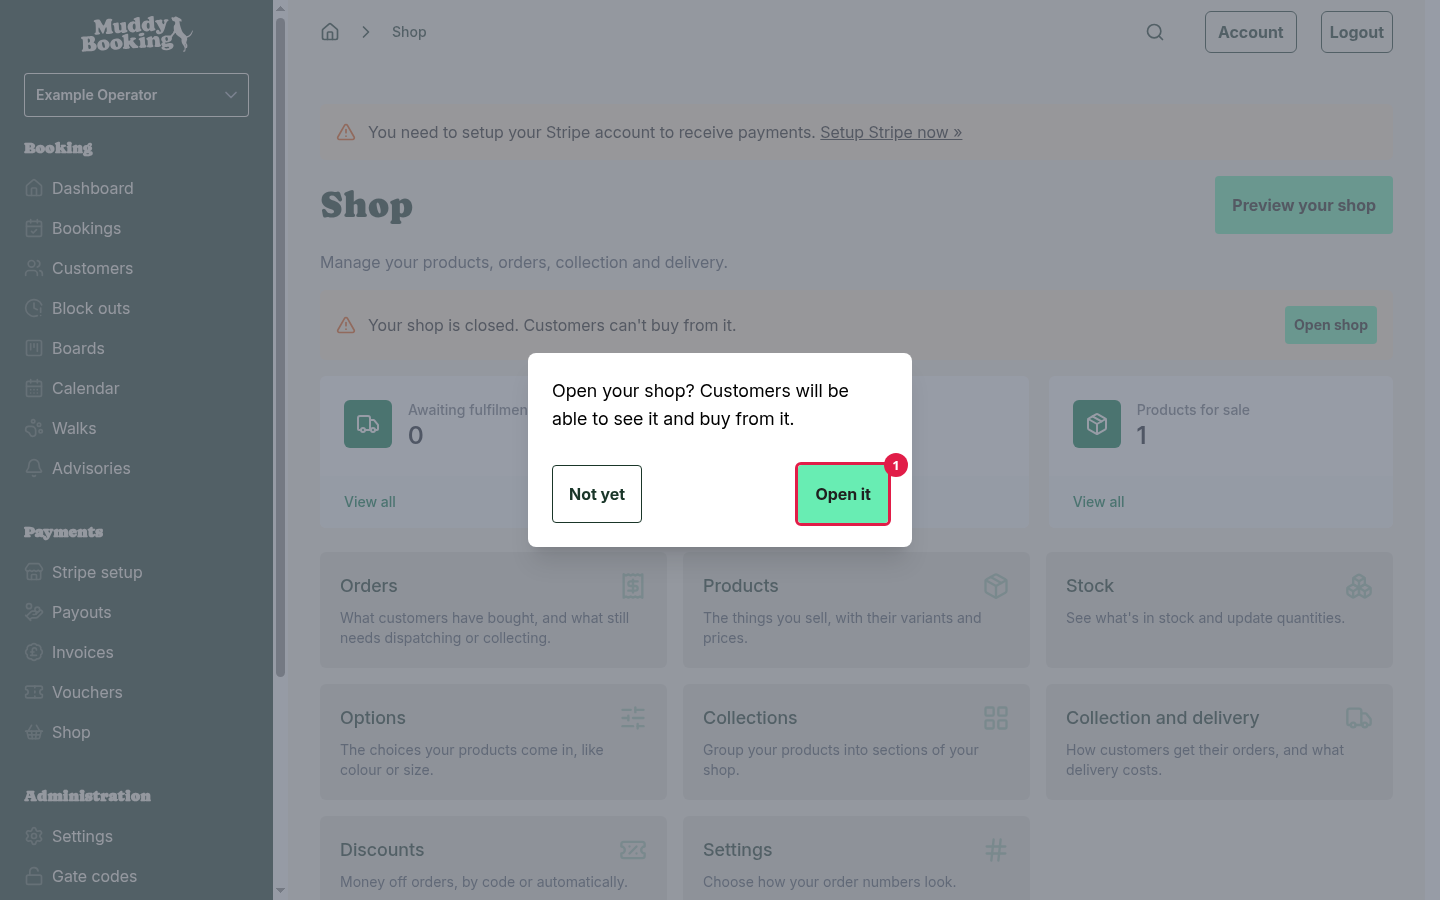
- Click Open shop (1) in the yellow box. If you want to check your shop first, click Preview your shop (2).
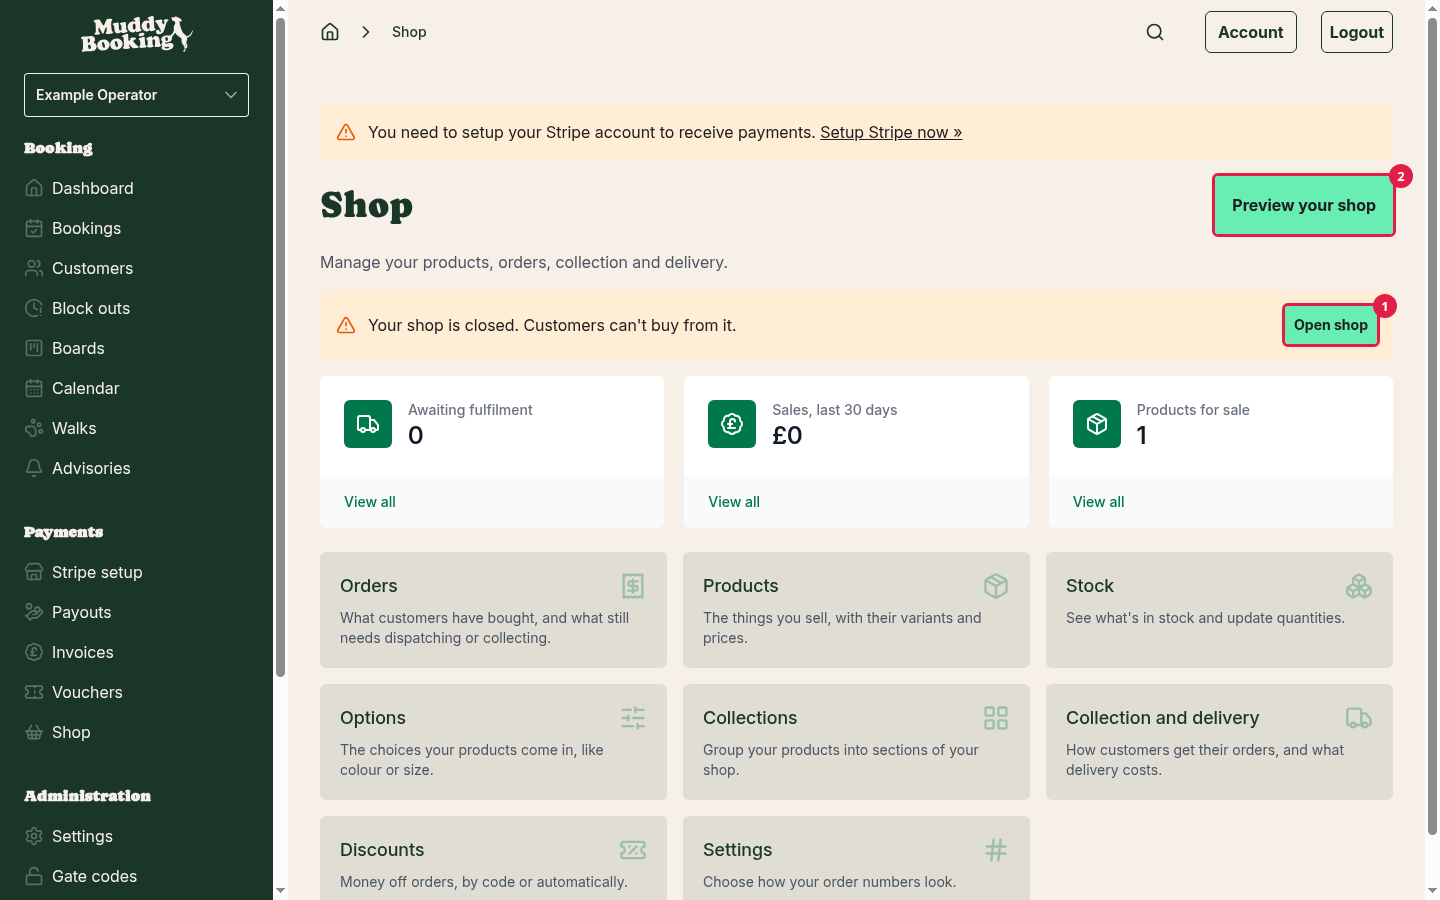
- Click Open it (1) to confirm.
Closing your shop
You can close your shop at any time, for example while you're away or restocking.
- Click Shop in the left-hand menu.
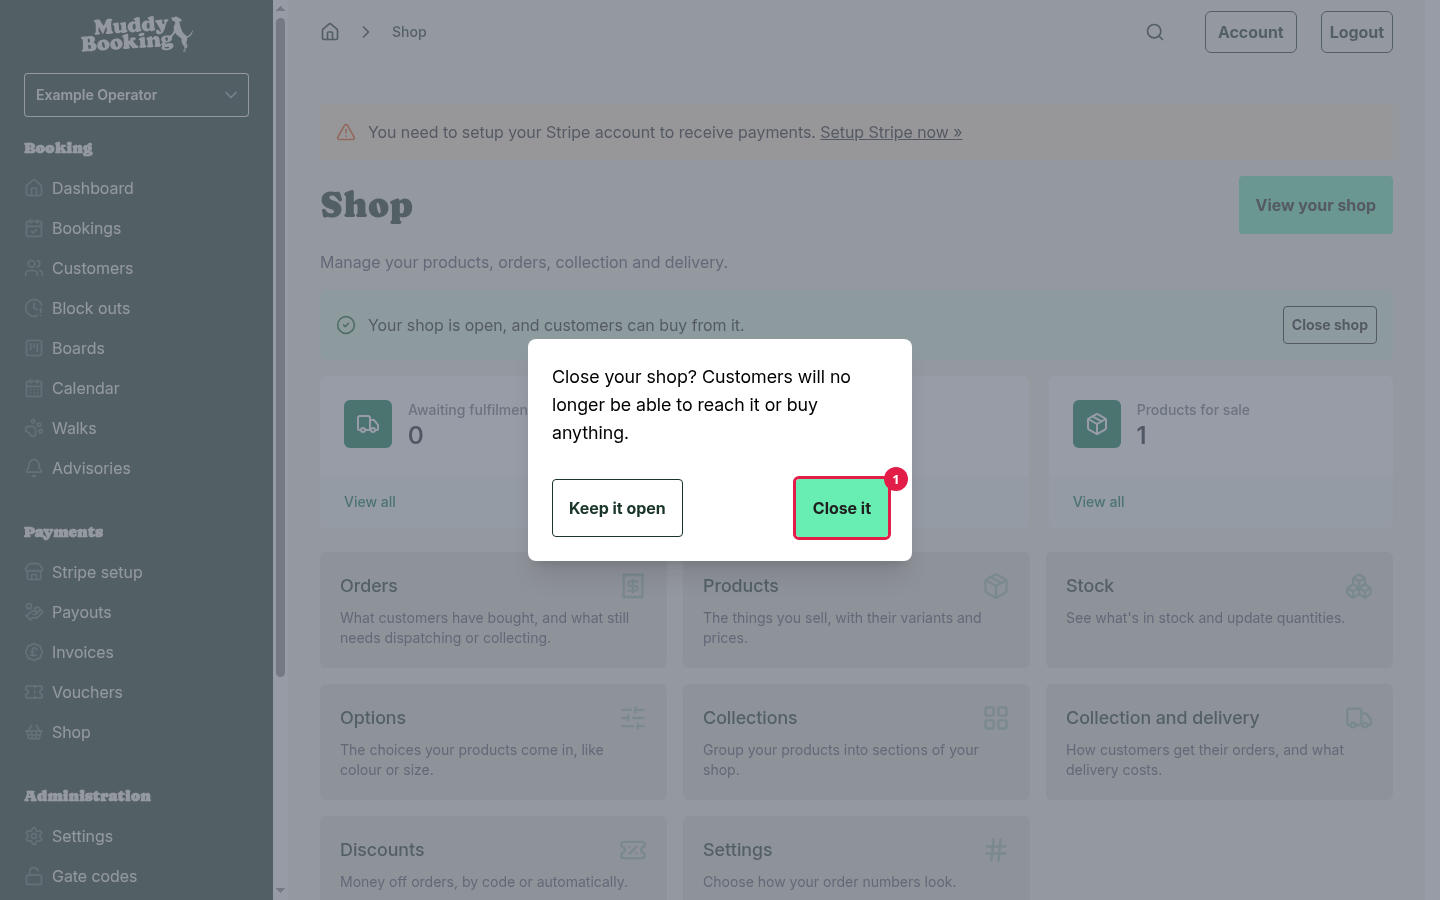
- Click Close shop in the green box.
- Click Close it (1) to confirm.
Closing the shop doesn't delete anything. Your products, collections, delivery settings and orders all stay as they are, ready for when you open again.
While the shop is closed:
- The Shop and Your orders links disappear from your website's menu.
- Anyone who visits a shop page sees a "page not found" message. Nothing mentions that you have a shop.
- Customers can still open the link in their order emails to check on an order they've already placed.
- You still manage your existing orders as normal.
Note: your shop only stays open while your Muddy subscription is active. If your subscription lapses, customers see the shop as closed, even though your Shop page still says it's open. Once your subscription is active again, the shop comes back with nothing lost.
Where customers find your shop
Your shop is at the /shop page of your Muddy website. When it's open, customers reach it from the Shop link in your website's menu.
If you've embedded Muddy on your own website (for example on WordPress or Squarespace), the Shop link isn't shown inside the embedded booking form. Instead, add your shop to a page on your website and link to that page from your website's menu. See Adding your shop to your website.
Terms and policies at checkout
The checkout shows the legal policies you've published (terms and conditions, privacy policy, and your banned breeds and cancellation policies if you have them). How they appear depends on one setting:
- Go to Settings.
- Click Legal.
- Look at Require acceptance (1).
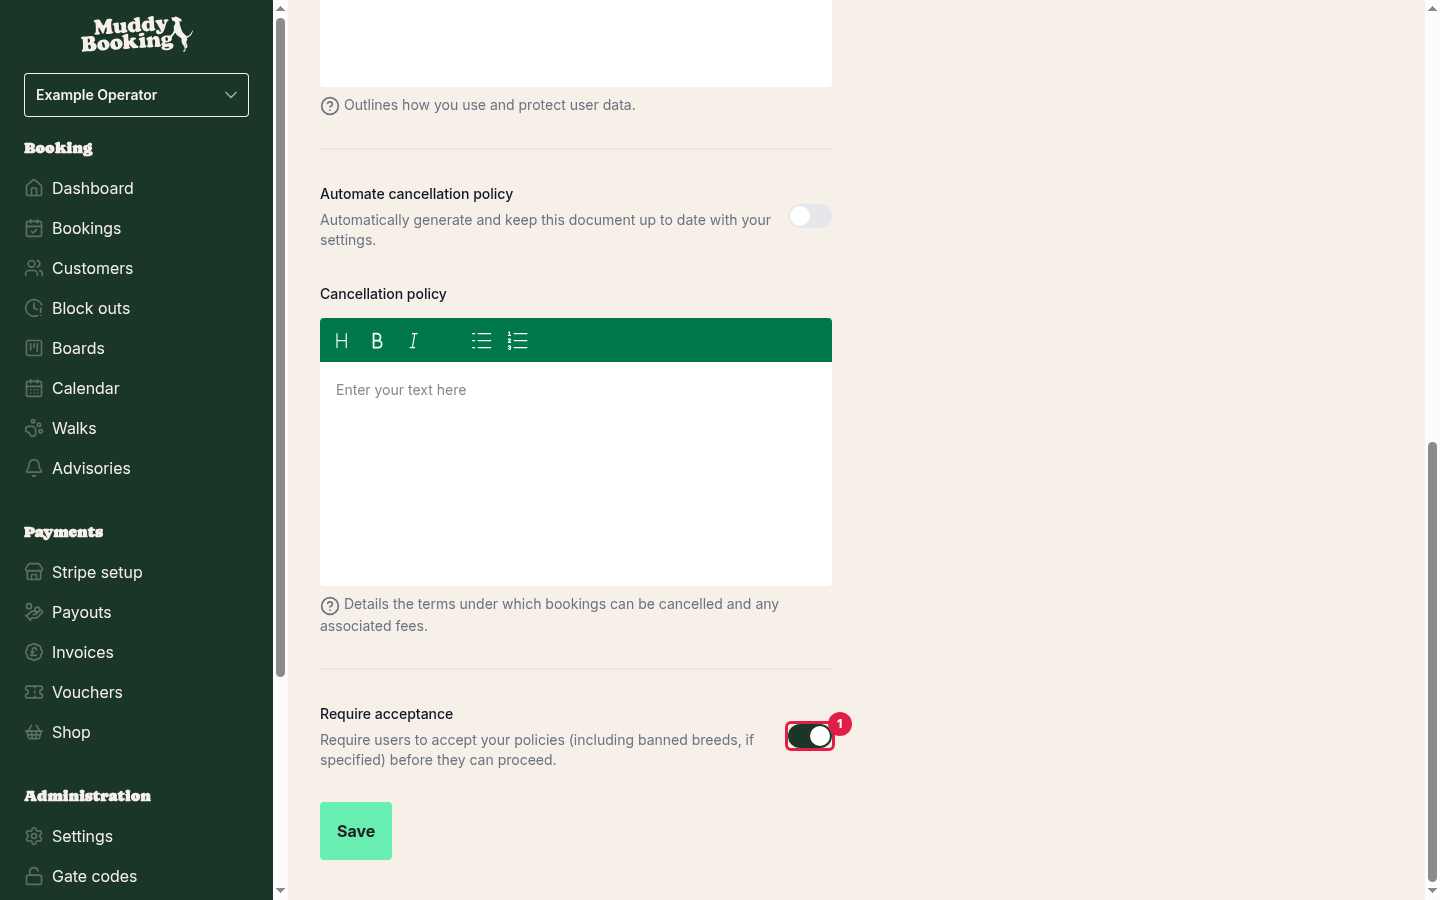
- Require acceptance on: customers must tick I accept the… before they can continue to payment. This is the same setting that applies to bookings.
- Require acceptance off: customers see By continuing, you accept our…, with links to each policy, but don't need to tick anything.
If you haven't published any policies, nothing is shown.
Note: Apple Pay and Google Pay buttons always show the By continuing, you accept our… wording, even when Require acceptance is on. This is because the wallet takes over the payment in one step.
Order numbers
Every order gets a number, like #1042. Customers see it on their receipt and in emails, and it's what they'll quote if they get in touch. You can change how it looks.
- Click Shop in the left-hand menu.
- Click Settings.
Order number prefix
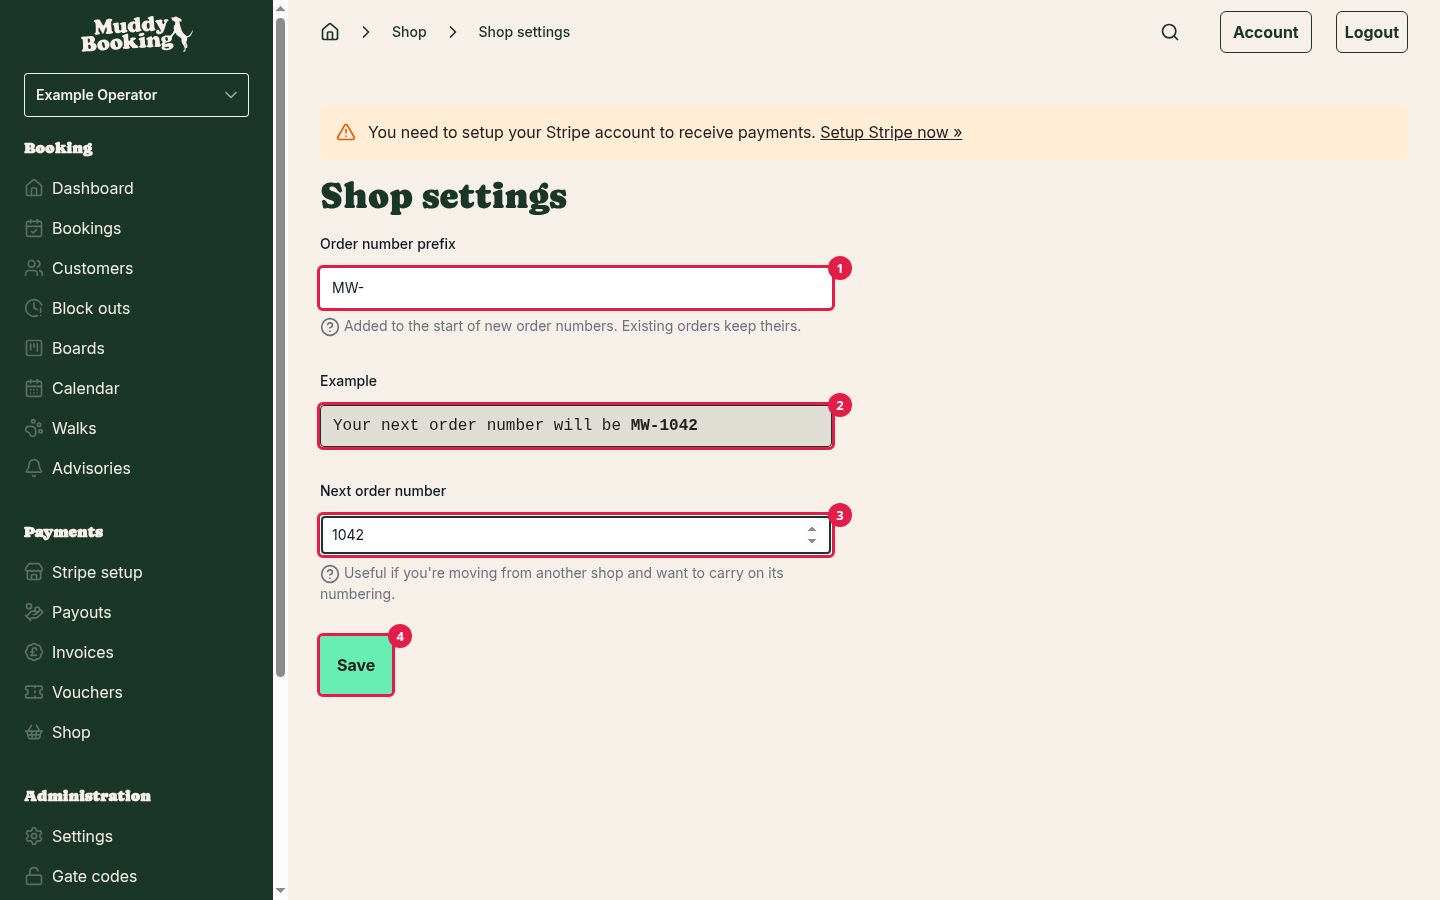
The letters or symbols shown in front of the number. For example, a prefix of MW- (1) gives order numbers like MW-1042 (2). Leave it blank to use #.
You can use up to 10 characters: letters, numbers, spaces, and the characters - / _ #. Changing the prefix only affects new orders. Orders you've already taken keep the number they were given.
Next order number
The number your next order uses (3). This is handy if you're moving from another shop and want your numbering to carry on from where it left off. Leave it empty to carry on from your last Muddy order.
It has to be higher than any order number you've already used. After the next order takes the number, numbering carries on from there automatically.
The Example box (2) shows what your next order number will look like as you type. Click Save (4) when you're happy.
Emails you'll get
These go to the admin users on your account. Each person can switch off the ones marked below from their profile, under Notification preferences.
- New shop order #1042: when a customer pays for an order. Listed as Shop order placed in your preferences, and can be switched off.
- Order #1042 could not be completed: if a customer paid but something went wrong on our side. The payment is kept, but the customer hasn't been sent a confirmation. Contact support if you get one of these. You can't switch this email off.
- Not enough stock for order #1042: if two customers bought the last of something at the same time. See Tracking stock. Listed as Stock oversold in your preferences, and can be switched off.