What are block outs?
Block outs are a way to prevent bookings during specific times when you're not available. For example, you might want to reserve time for maintenance activities like cutting grass, personal appointments, or holidays.
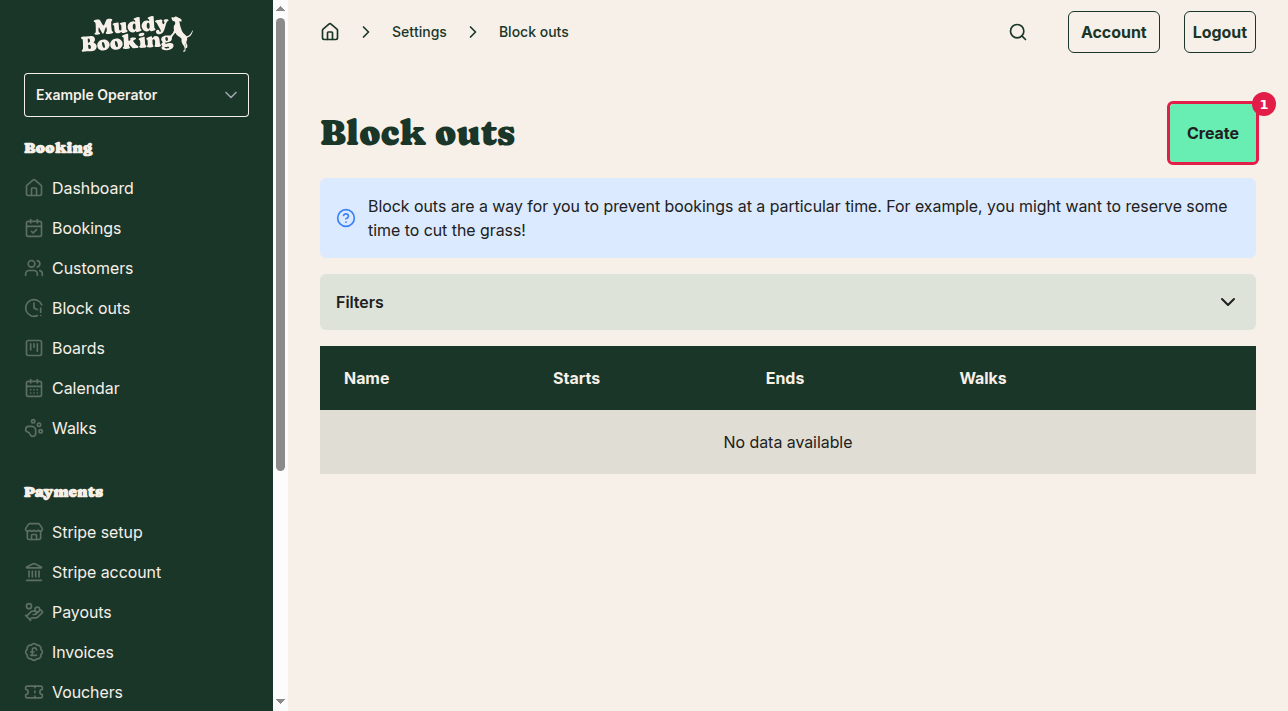
How to access block outs
There are two ways to get to the block outs section:
Option 1: From the main menu
- Click Block outs in the left-hand menu
Option 2: Through Settings
- Click Settings in the left-hand menu
- Under the Bookings section, click Block outs (1)

Both options will take you to the same block outs page.
Adding a new block out
Step 1: Start creating a block out
From the main block outs page, click the Create button (1) to start adding a new block out.
Step 2: Fill out the block out details
You'll see a form with several fields to complete:
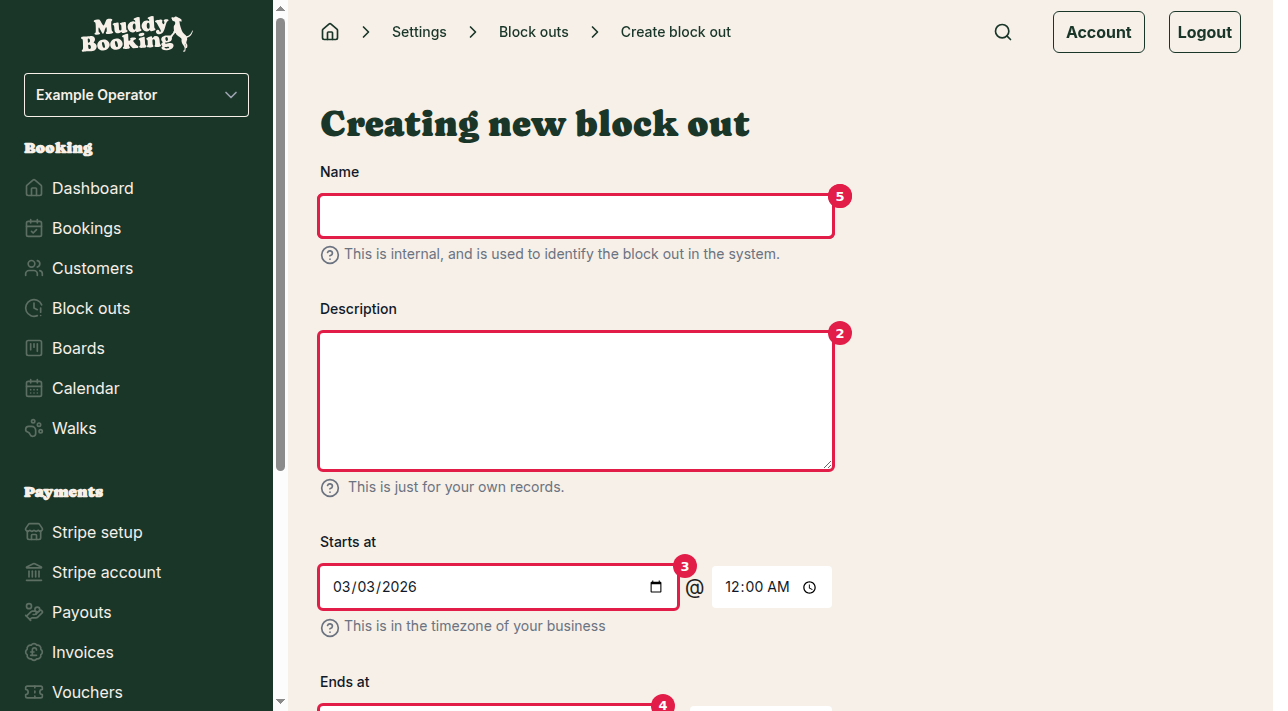
Name (1) (Required) Enter a name to identify this block out in your system. This is just for your internal reference — customers won't see this name. For example: "Grass cutting", "Holiday", or "Equipment maintenance".
Description (2) (Optional) Add any additional notes about this block out for your own records. This might include specific details about why you're blocking this time.
Starts at (3) (Required) Set when the block out begins. Click the field to select both the date and time. The system will use your business timezone.
Ends at (4) (Required)
Set when the block out ends. Click the field to select both the date and time. Make sure this is after your start time.
Walks (5) (Required) Choose which walks this block out applies to. You can select specific walks or multiple walks. This determines which services won't be available during the blocked time.
Step 3: Check for conflicts
The system will automatically check if your block out conflicts with any existing bookings. You'll see a message showing whether there are any conflicts.
If there are conflicts, you'll need to either:
- Change your block out times
- Contact customers to reschedule their bookings
- Cancel the conflicting bookings
Step 4: Save your block out
Once you've filled in all the required information and resolved any conflicts, click Create block out (6) to save your new block out.
What happens after creating a block out
- The blocked time will no longer be available for new bookings
- Customers won't be able to select the blocked time slots when making bookings online
- The block out will appear in your block outs list for future reference
- You can edit or delete the block out later if needed
Tips for using block outs effectively
- Plan ahead: Create block outs as soon as you know about upcoming unavailable periods
- Use clear names: Choose descriptive names so you can easily identify different block outs
- Regular maintenance: Consider setting up recurring block outs for regular maintenance activities
- Holiday planning: Block out holiday periods well in advance to prevent bookings during your time off
- Buffer time: Consider adding a small buffer before and after important activities to allow for preparation or overrun