Invoicing and automatic payments
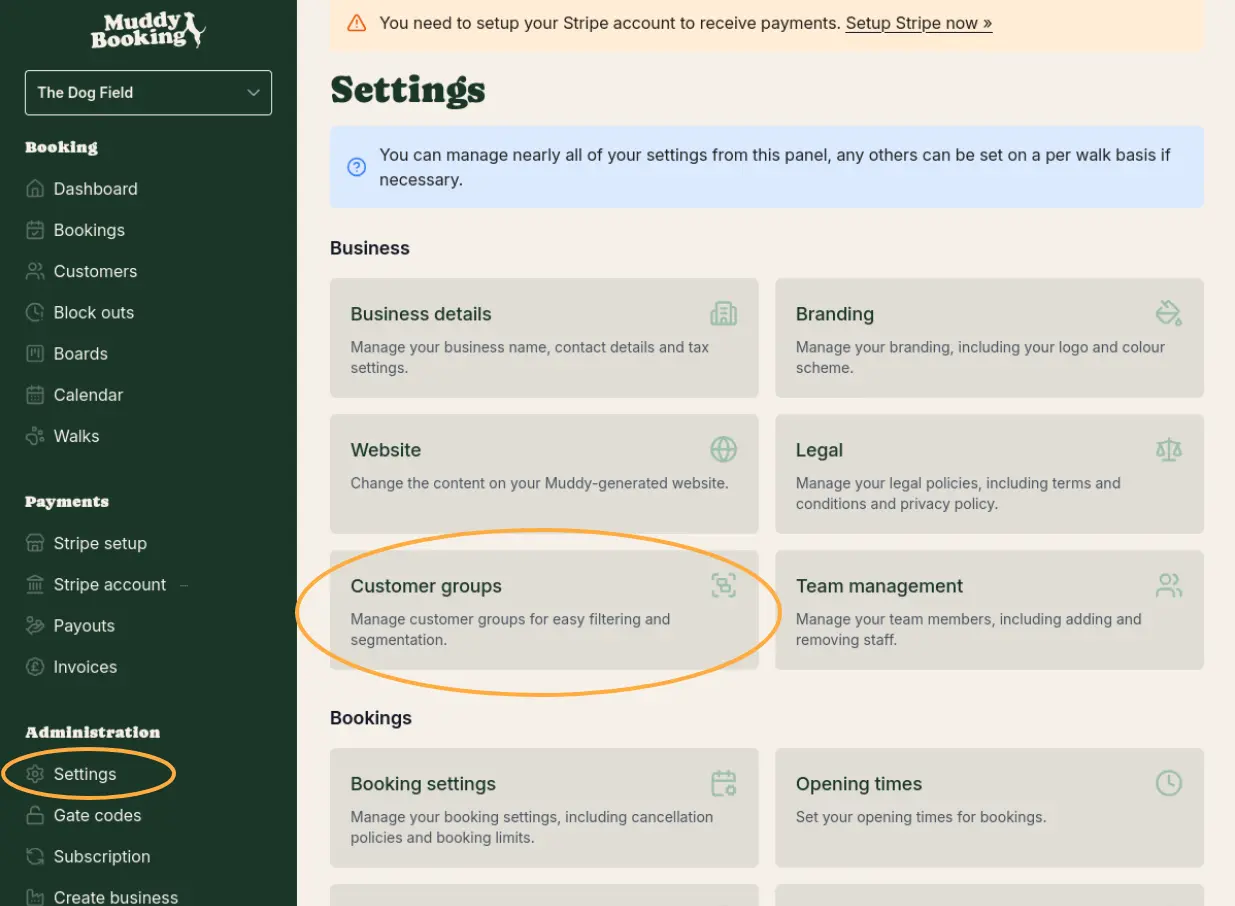
Step One
Go to 'Settings' in the 'Administration' section of the sidebar. From here, select customer groups.
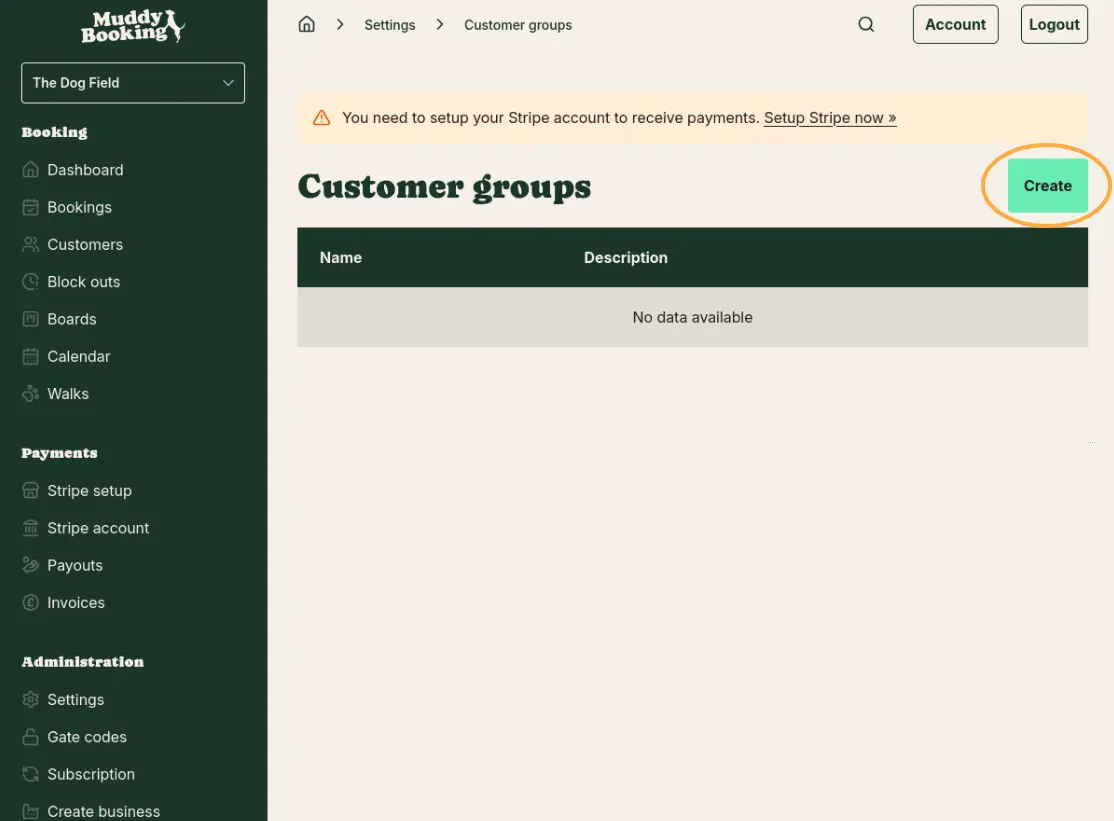
Step Two
Use the create button and fill in the details to create your first group.
Step Three
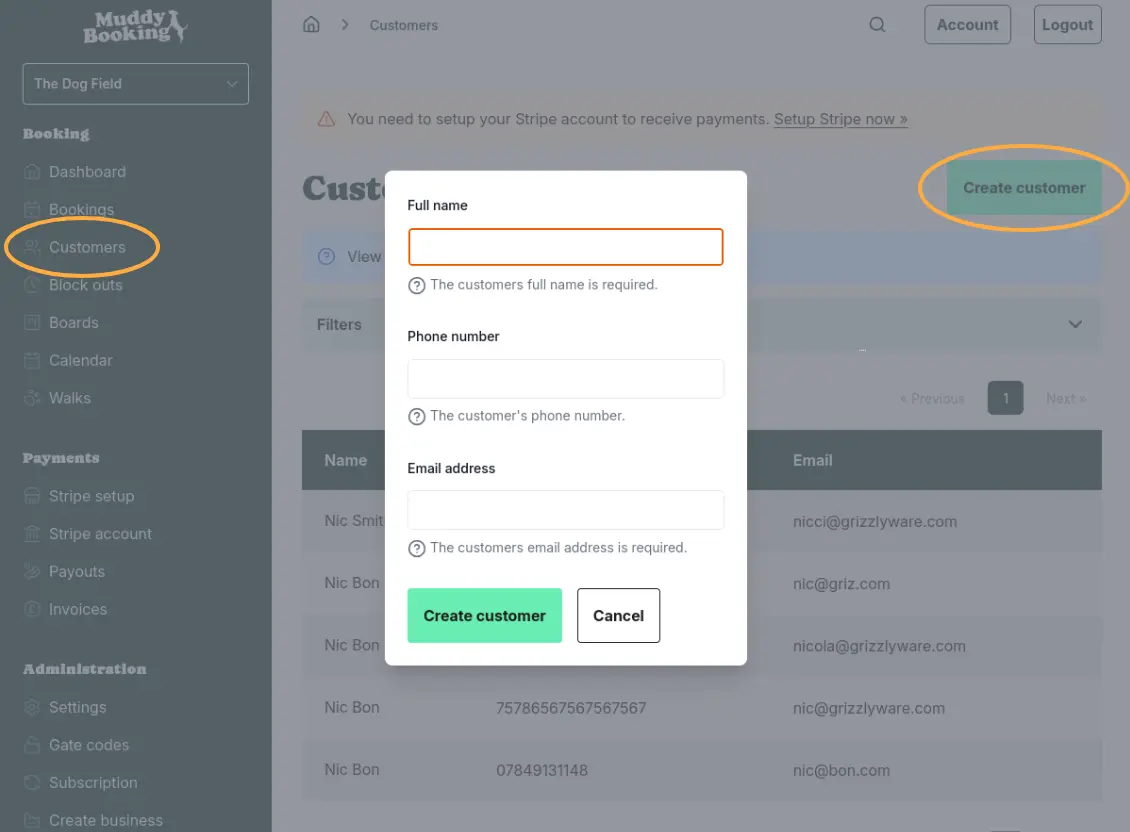
Go to 'Customers' in the 'Booking' section of the sidebar. Once here, create or find the customer you will be invoicing.
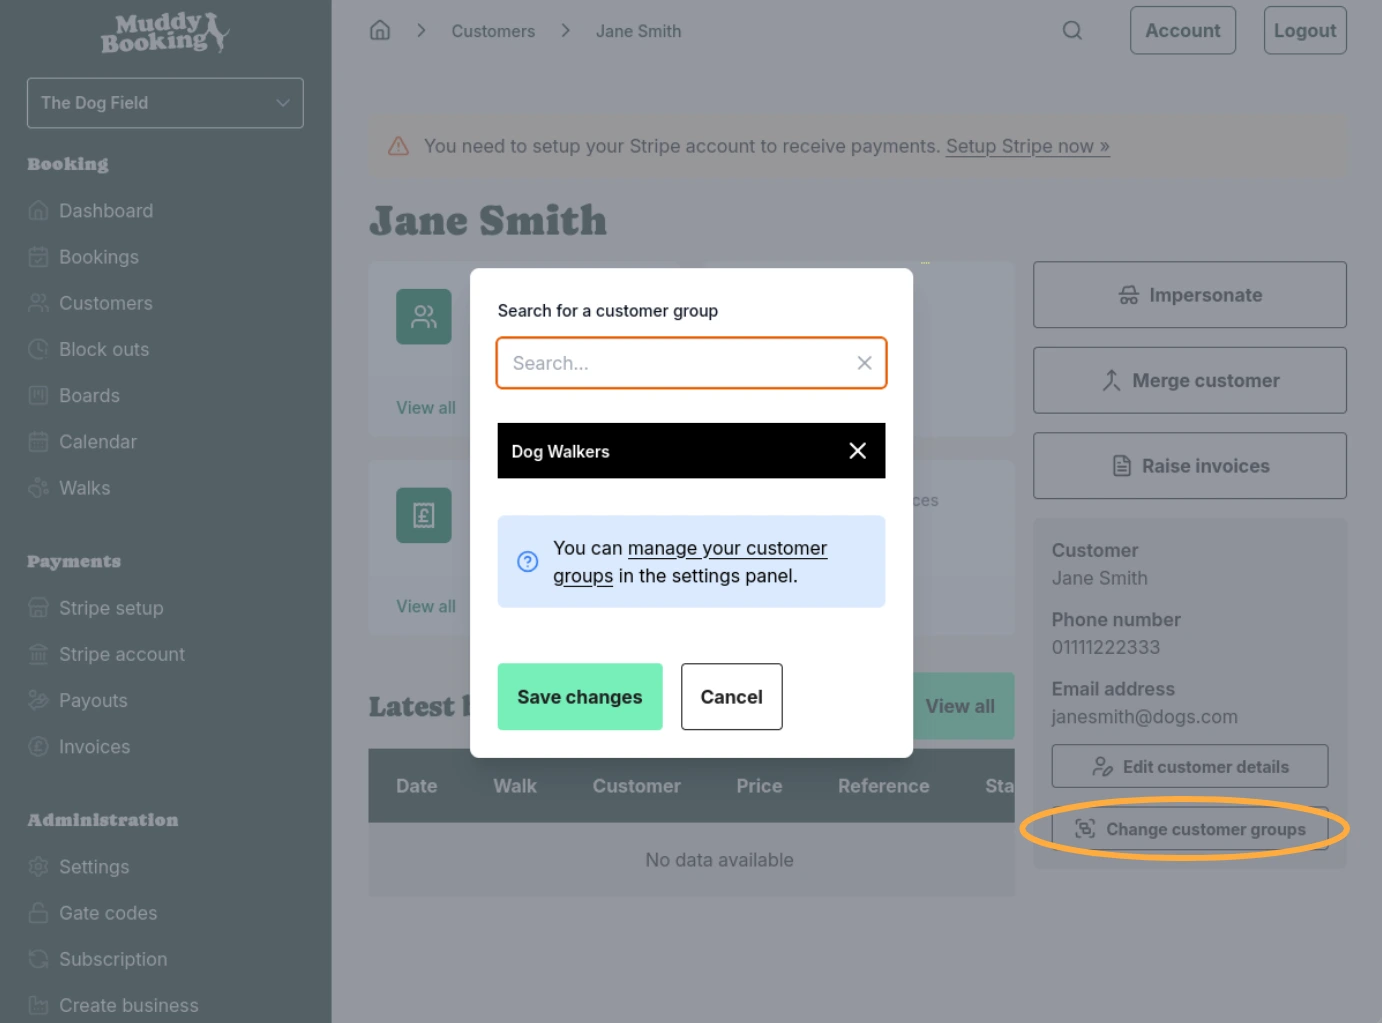
Step Four
Use the 'Change customer groups' button to add them to the customer group that you created in step one.
Step Five
Go to 'Settings' in the 'Administration' section of the sidebar. From here, select 'Payment settings'.

Step Six
Select 'Exclude specific groups' under the 'Upfront payment policy' section and then select the group you created in step one. If you want to allow all your clients to book without paying upfront, you can simply select 'Not required'.

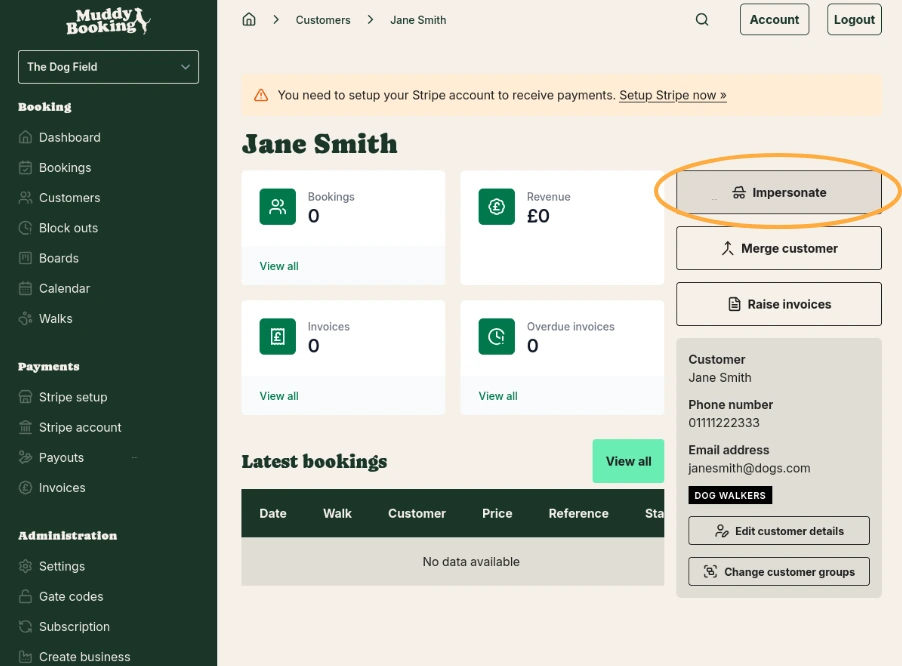
Step Seven
If you are making the booking on behalf of the customer, return to the customer you would like to invoice. Select 'Impersonate'.
If the customer is making the booking themselves, skip straight to step nine.
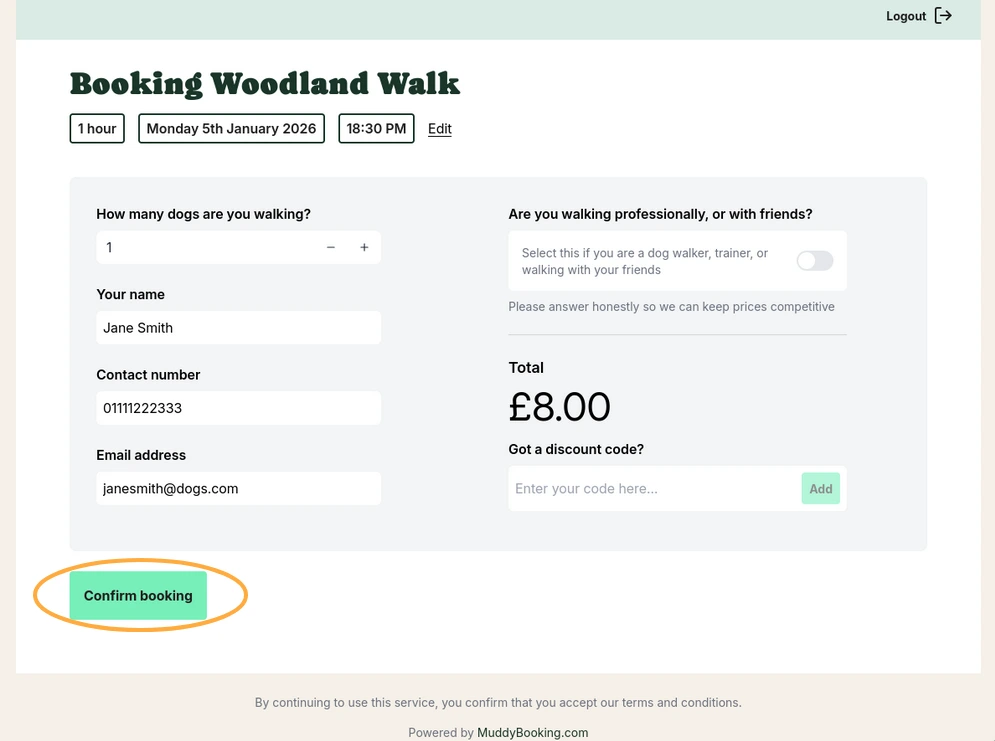
Step Eight
Make a booking for your customer. You should be able to complete the booking without payment.
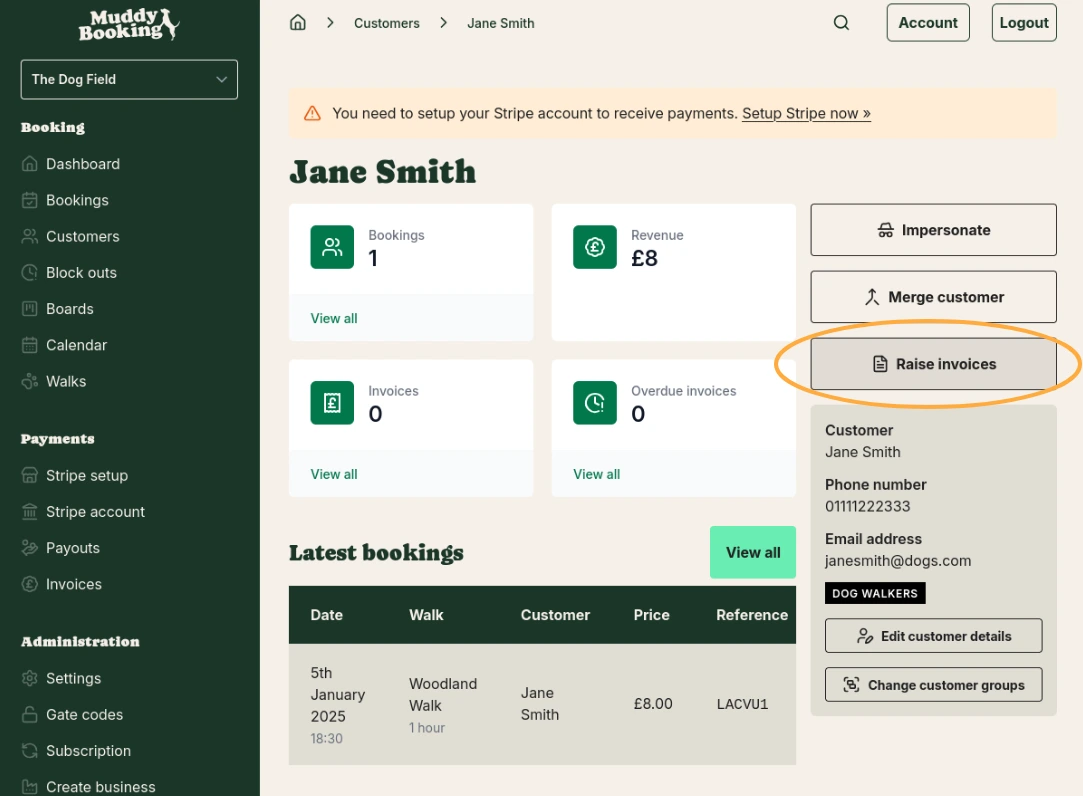
Step Nine
You can now go to back to your customer's profile and select 'Raise invoices' to manually raise invoices. Automatic payment capture is covered in step twelve.
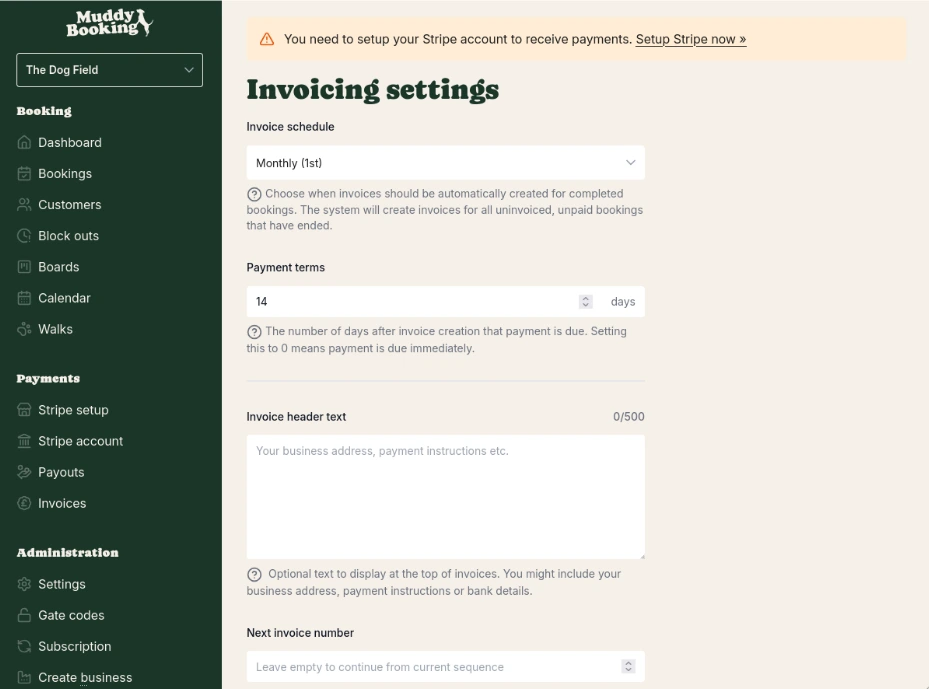
Step Ten
You can edit your invoicing settings by going to 'Settings' under the 'Administration' section in the sidebar and selecting 'Invoicing' in the 'Payments' section.
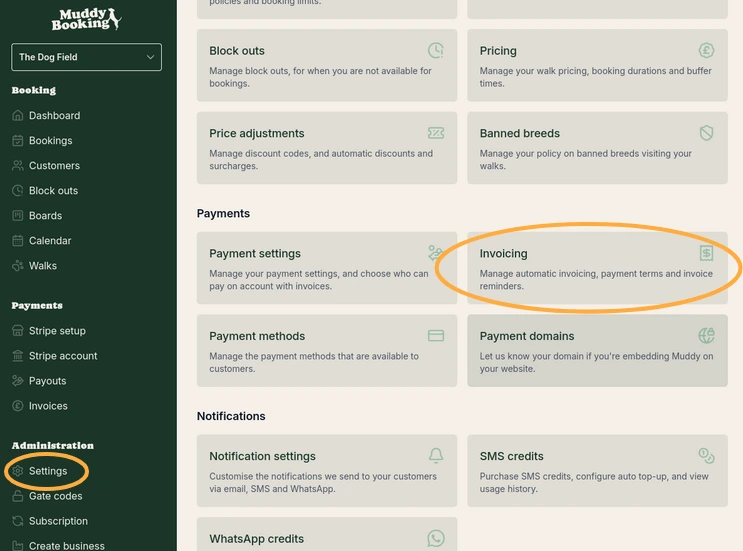
Step Eleven
Here you can edit things such as the automatic invoice schedule, payment terms and reminders, amongst other things.
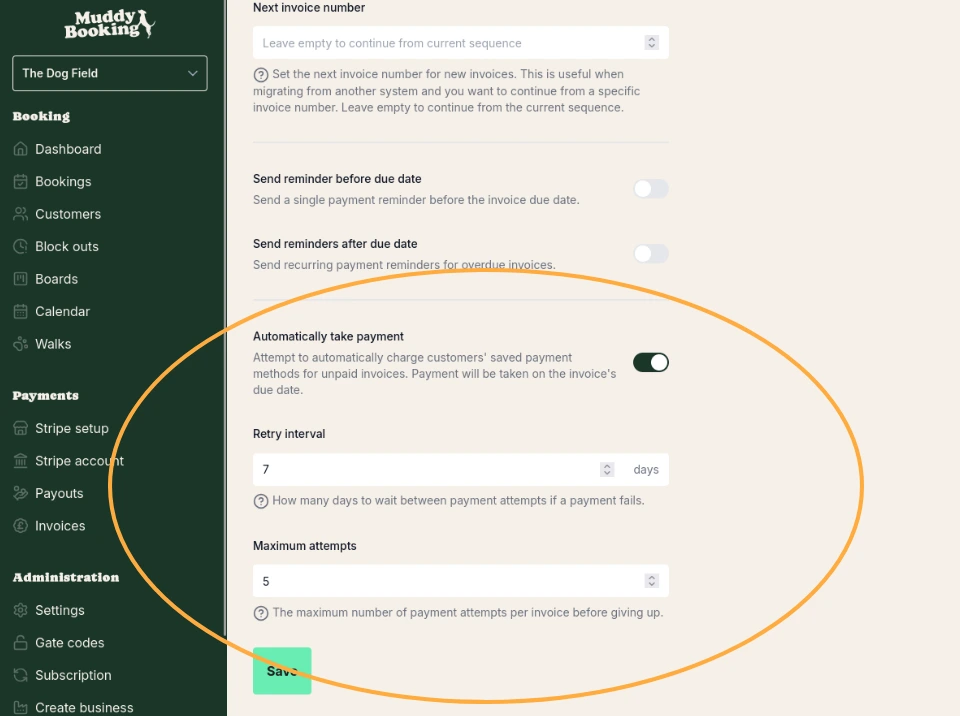
Step Twelve
From here, you can also choose to automatically capture payments from your customers' saved payment methods.
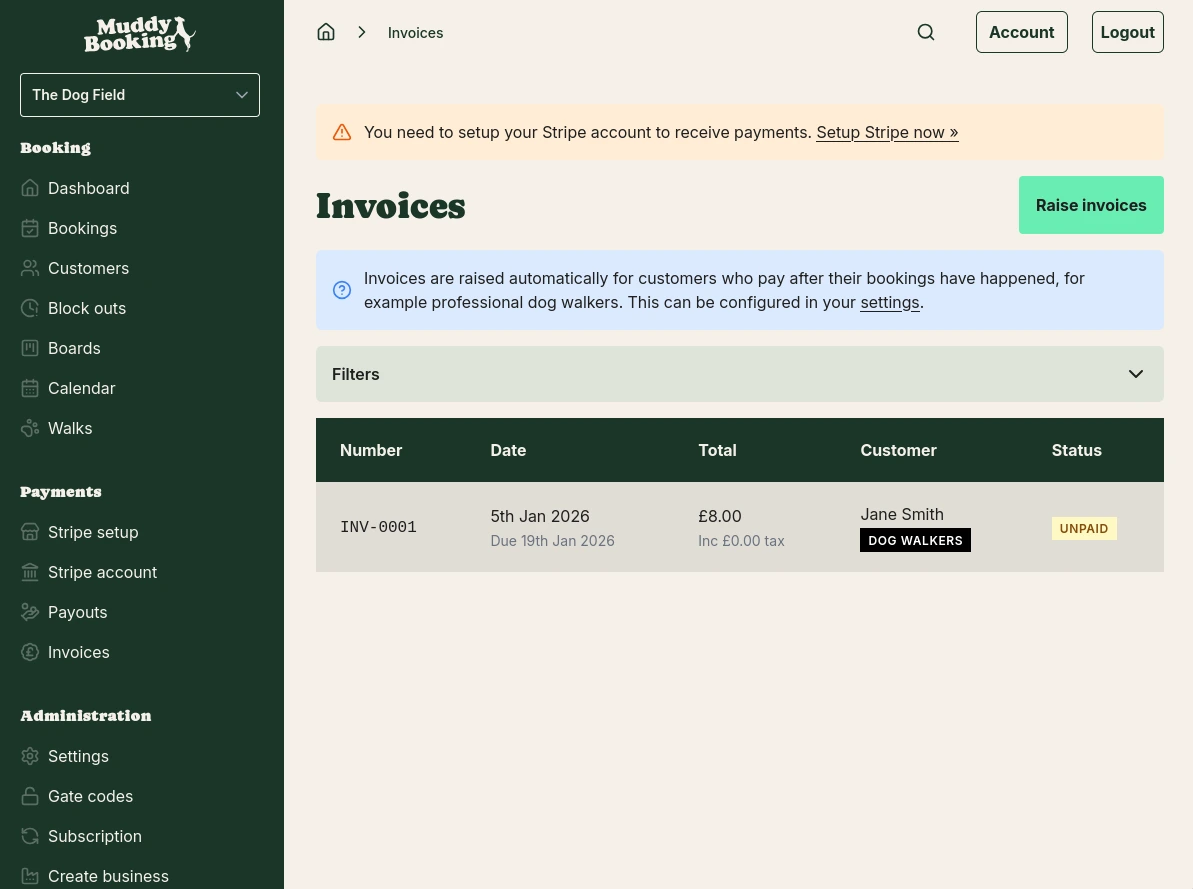
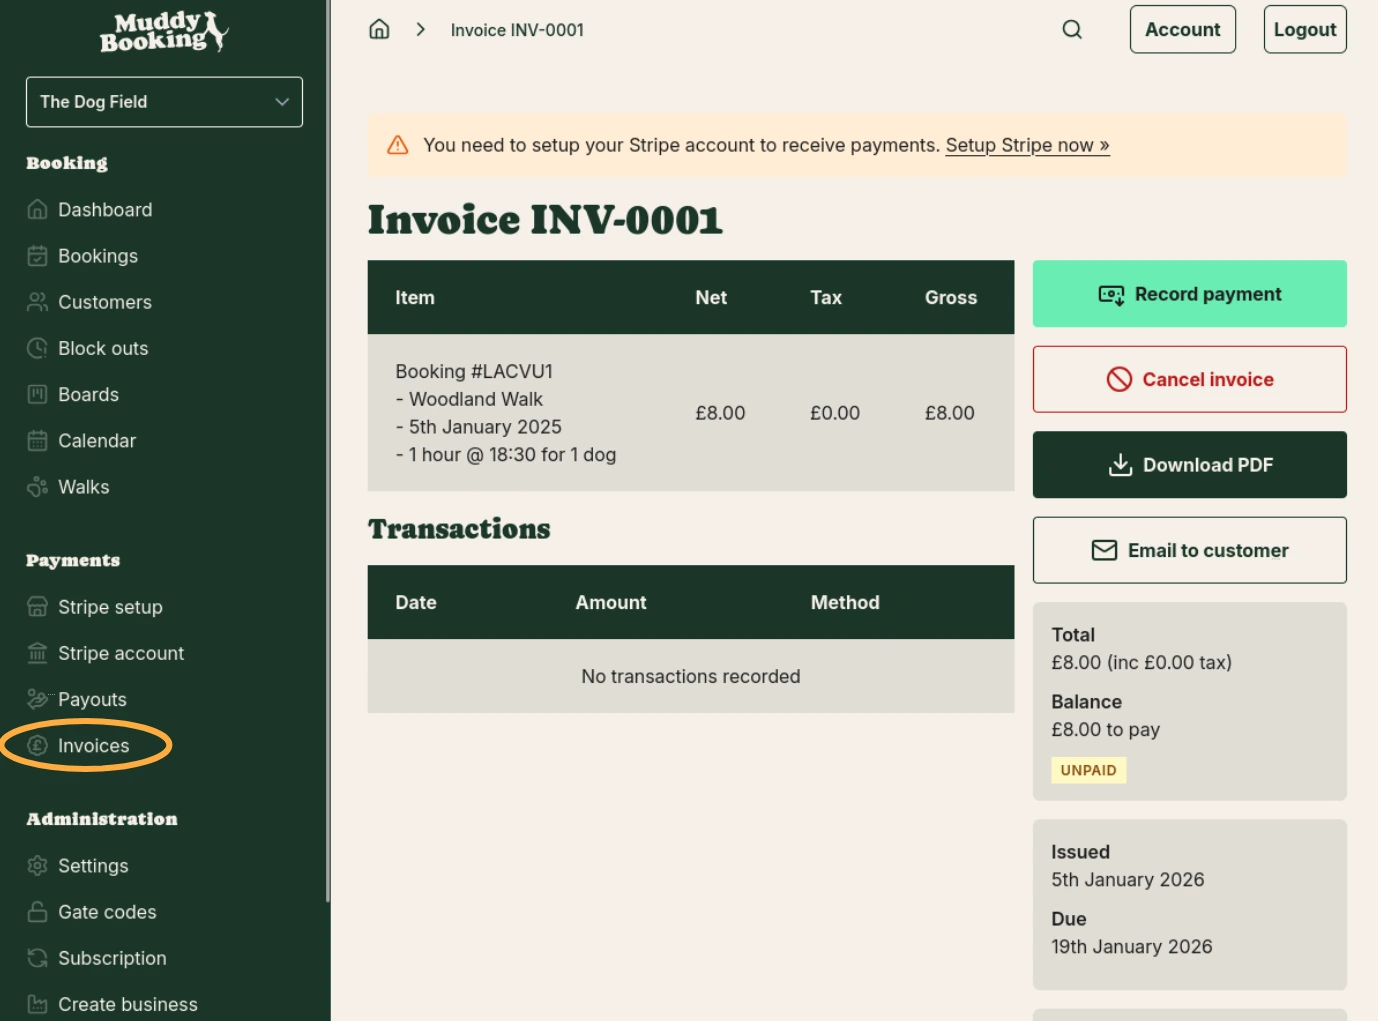
Step Thirteen
Invoices can be managed by going to 'Invoices' under the 'Payments' section in the sidebar. Here you can download, cancel or email invoices as well as record offline payments such as cash, BACS and cheque.
You're all set up!
You can now invoice customers.